I’ve started a new project recently to build an air quality monitoring station. This really came about after me being curious as to how bad the air quality was during my daily commute into London. There are parts of that commute where I can literally taste the car fumes and so was curious exactly how bad it really was. Also, I watched a video recently about how high CO2 levels affect your cognitive performance and that got me very curious as to what the levels of CO2 were, both at home and in my work office. So, I decided to build a portable air quality monitoring station to sense and record the levels of both particulates, CO and CO2, with more sensors to be added at a later date.
So, the micro-controller I am using for this project is a NodeMCU Amica which is an ESP8266 based device. The advantage of this is a fast processor (up to 160MHz) lots of memory (4Mb) and plenty of pins broken out to add peripherals to. I am currently using a small ILI9341 based TFT colour display and have an Sensirion SPS30 particulate sensor attached to display the size and concentration of particles. I also have an MQ9 Carbon Monoxide sensor and a MH-Z19 Carbon Dioxide sensor. Both have yet to be attached.
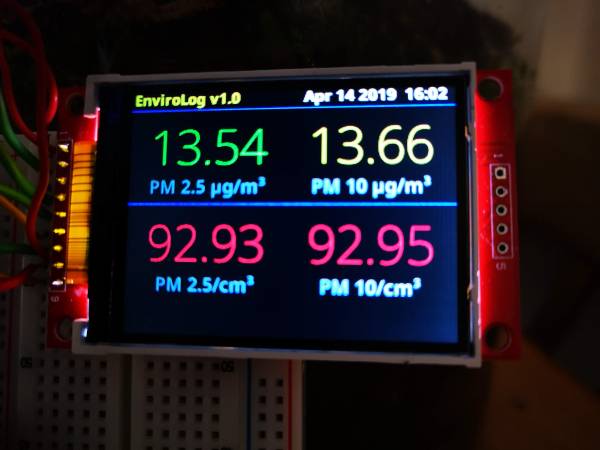
In the image above you can see the current output on the display. Top left and right I am showing the number of particles of sizes 2.5 microns or smaller and 10 microns or smaller respectively per metre cubed. The bottom shows the concentration of these sized particles per cm cubed. I am using a NEO-6M GPS module to provide the data and time for logging purposes. I will also be using this to log the location for when the device is being used during travel or in different locations.
Prototype for the air quality monitoring station
The code currently keeps a running average of the totals per minute, per hour and per 24 hours. These will be used to display the Air Quality Index (according to Defra).
Later additions to this project will be to add the CO and CO2 sensors, to record the data onto an SD Card and to also transmit the data to somewhere it can be viewed online. I may use the Adafruit MQTT service for this. I have not decided fully yet. I may also add in further sensors at a later date to make it into a full environmental monitoring station and couple the data from this device with that being received from my external weather station.
If you are interested in seeing this device in action or would like to learn how to build your own, then pop along to a Medway Makers meetup to see it for yourself. Further updates to this project will be posted as further progress is made.
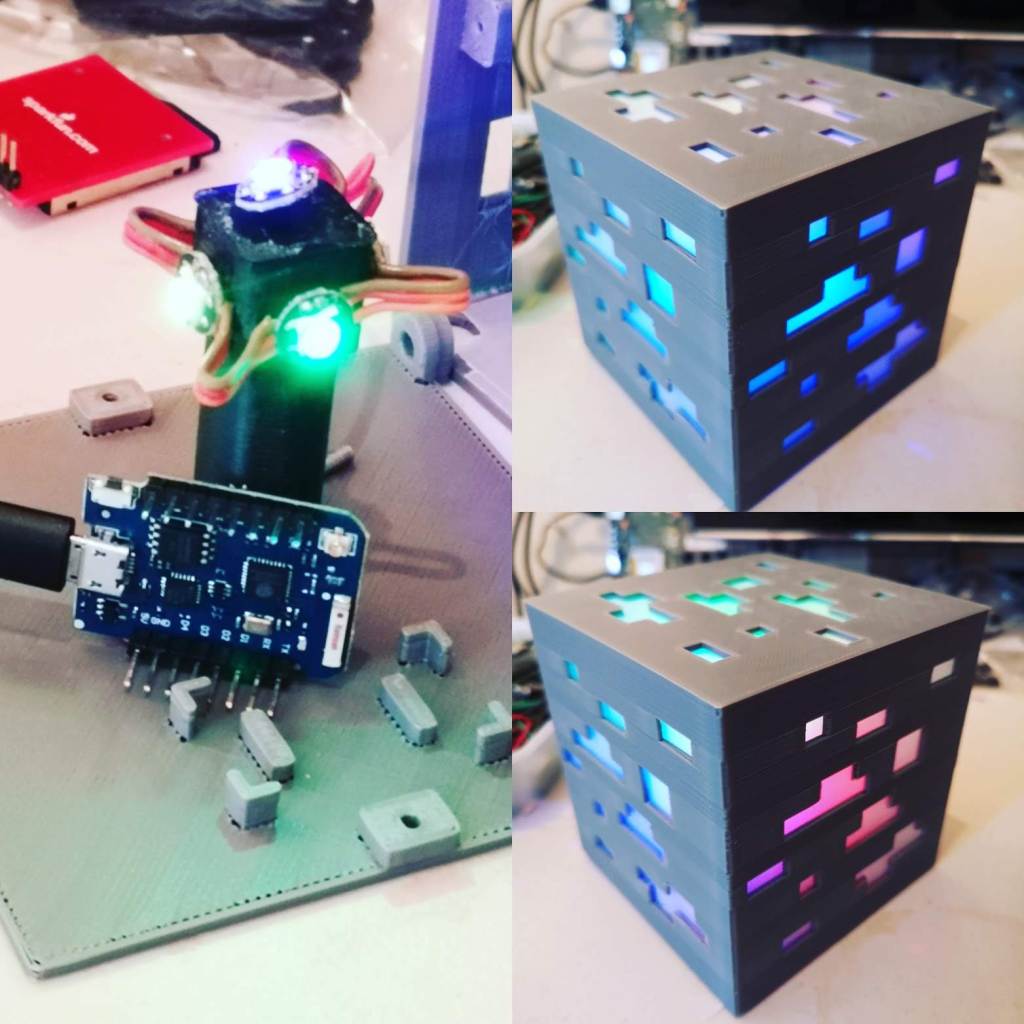
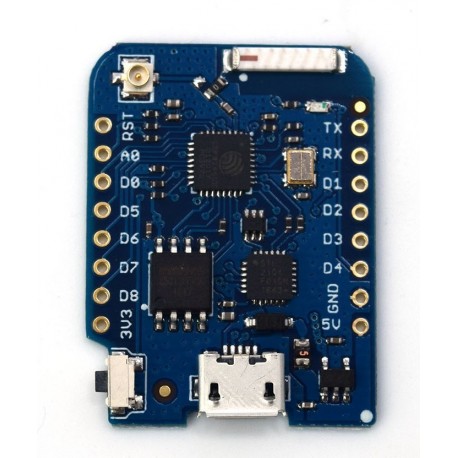
So we started a little fun project recently to make some RGB Mood Lamps. We chose a Minecraft Ore block as the basis for the lamp itself. I found the STL files to 3D Print the block on Thingiverse. A few were printed out using black filament and several were done in matt grey. The original lamps had a holder on the base designed to fit an Arduino Micro Pro. As this is a kind of Arduino I never use I redesigned a new base that would hold a Wemos D1 Mini. The Wemos has an ESP8266 module and so gives the lamp WiFi capability to enable remote control.
Minecraft Ore Lamp using a Wemos D1 Mini
In the centre of the lamp are 5 RGB neopixels to allow any chosen colour on all 5 visible sides. The photo above shows some nice colour gradients between the sides.
After assembling the lamps I then wrote some code to make the lamps change colours, do some patterns and some modes such as ‘Police Mode’ where it flashes blue and red like a Police car.
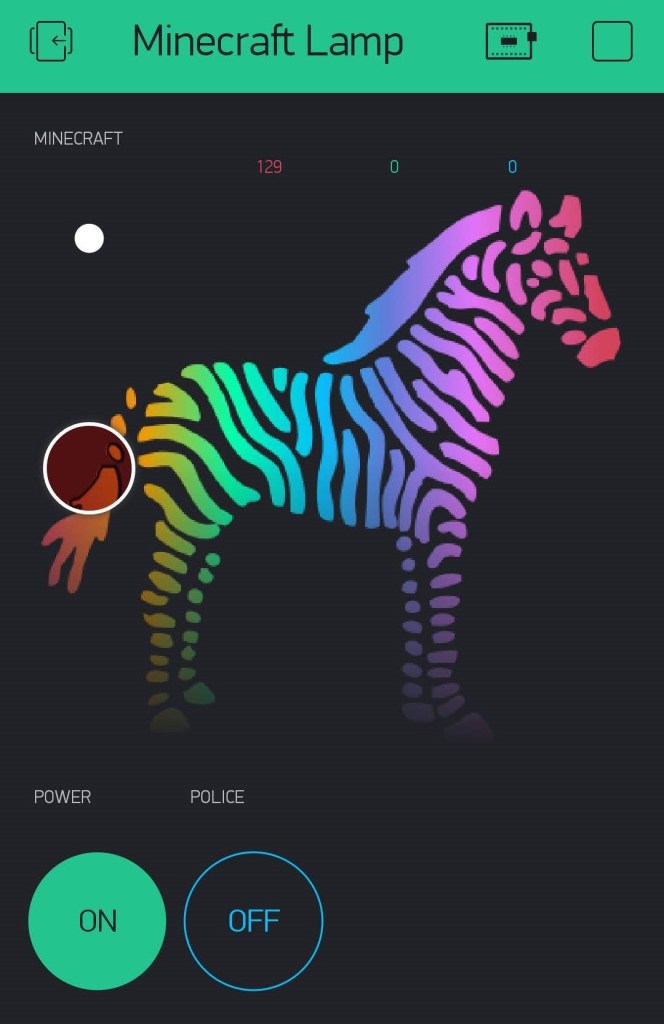
I then added some further code to enable the lamp to be controlled from a mobile phone using the Android Blynk app. The app allows you to choose any colour you want, to turn the lamp on and off and to choose Police Mode. Further modes will be added as and when I get around to coding them.
Blynk app for the Minecraft Ore Lamp
A video of the lamp in action can be seen below.
I shall be posting up the code on my GitHub once complete.
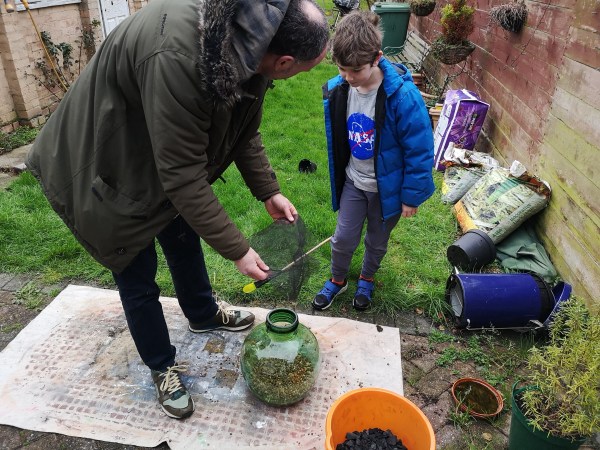
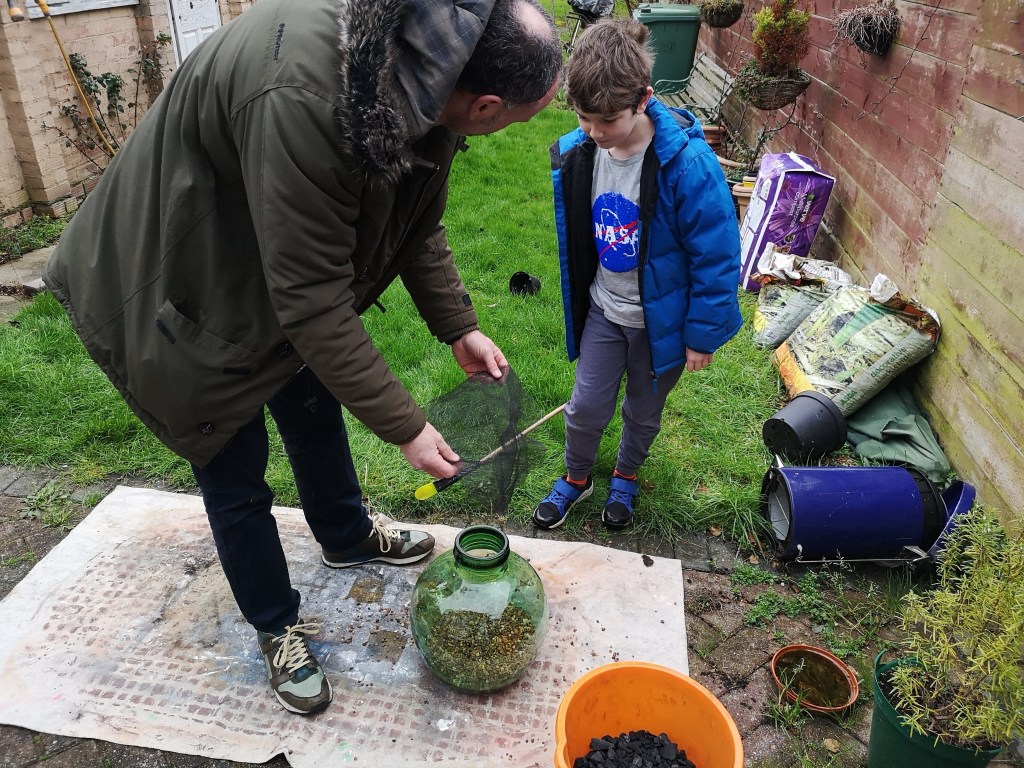
We had a very interesting meetup on Sunday 27th January. For a change, we did something different and instead of electronics, for the first half of the session we built some terrariums.
Building a bottle terrarium
Tom turned up with a beautiful green recycled glass bottle he had just won on eBay as well as boxes and buckets of plants, gravel, compost, moss, mesh and other bits and bobs. Tom and his son then proceeded to build a really nice terrarium in the bottle, using some pieces of slate to landscape it with. Mike gave Tom some springtails to put inside the terrarium too as a ‘cleanup crew’ to take care of leaf litter, algae and mould.
Mike made a smaller terrarium using a clip-lock lid jar from Ikea. He also has a nice large laboratory flask that he is planning on cleaning out and making a terrarium inside. Building the terrariums (despite the cold and wet weather) made for a nice refreshing change from Arduinos, Raspberry Pis and other electronic related stuff.
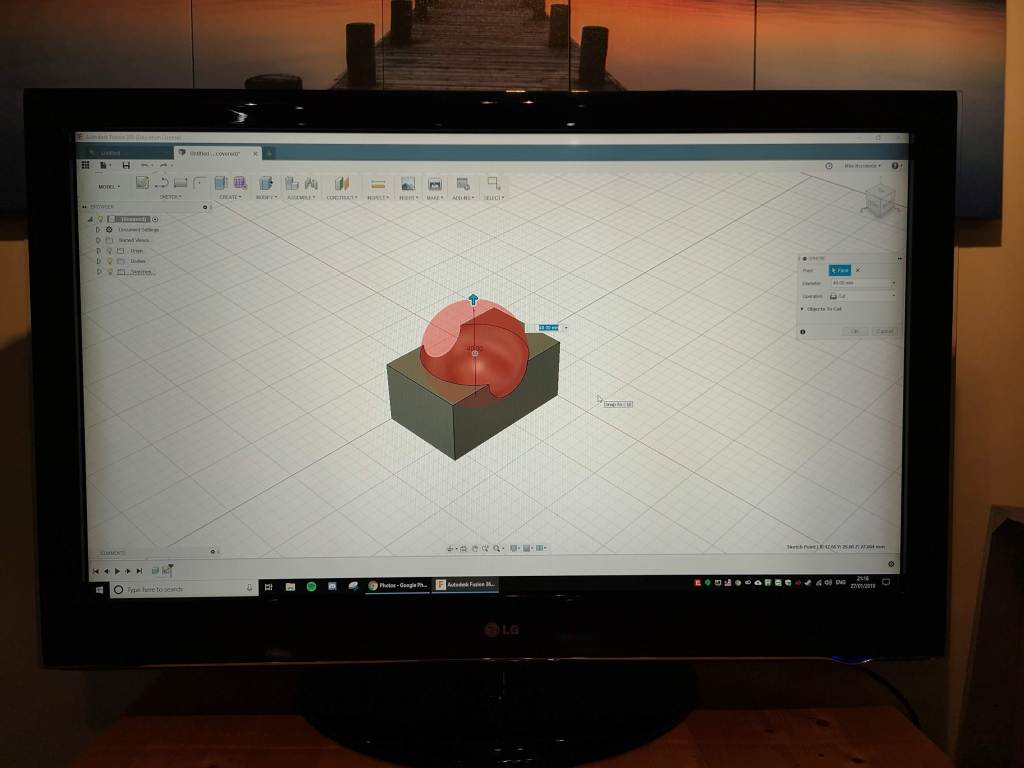
For the second half of the meetup Mike ran an ‘Introduction to Fusion 360’ workshop fro about 3 hours, which the attendees found very useful. Further Fusion 360 workshops are planned for a later date.
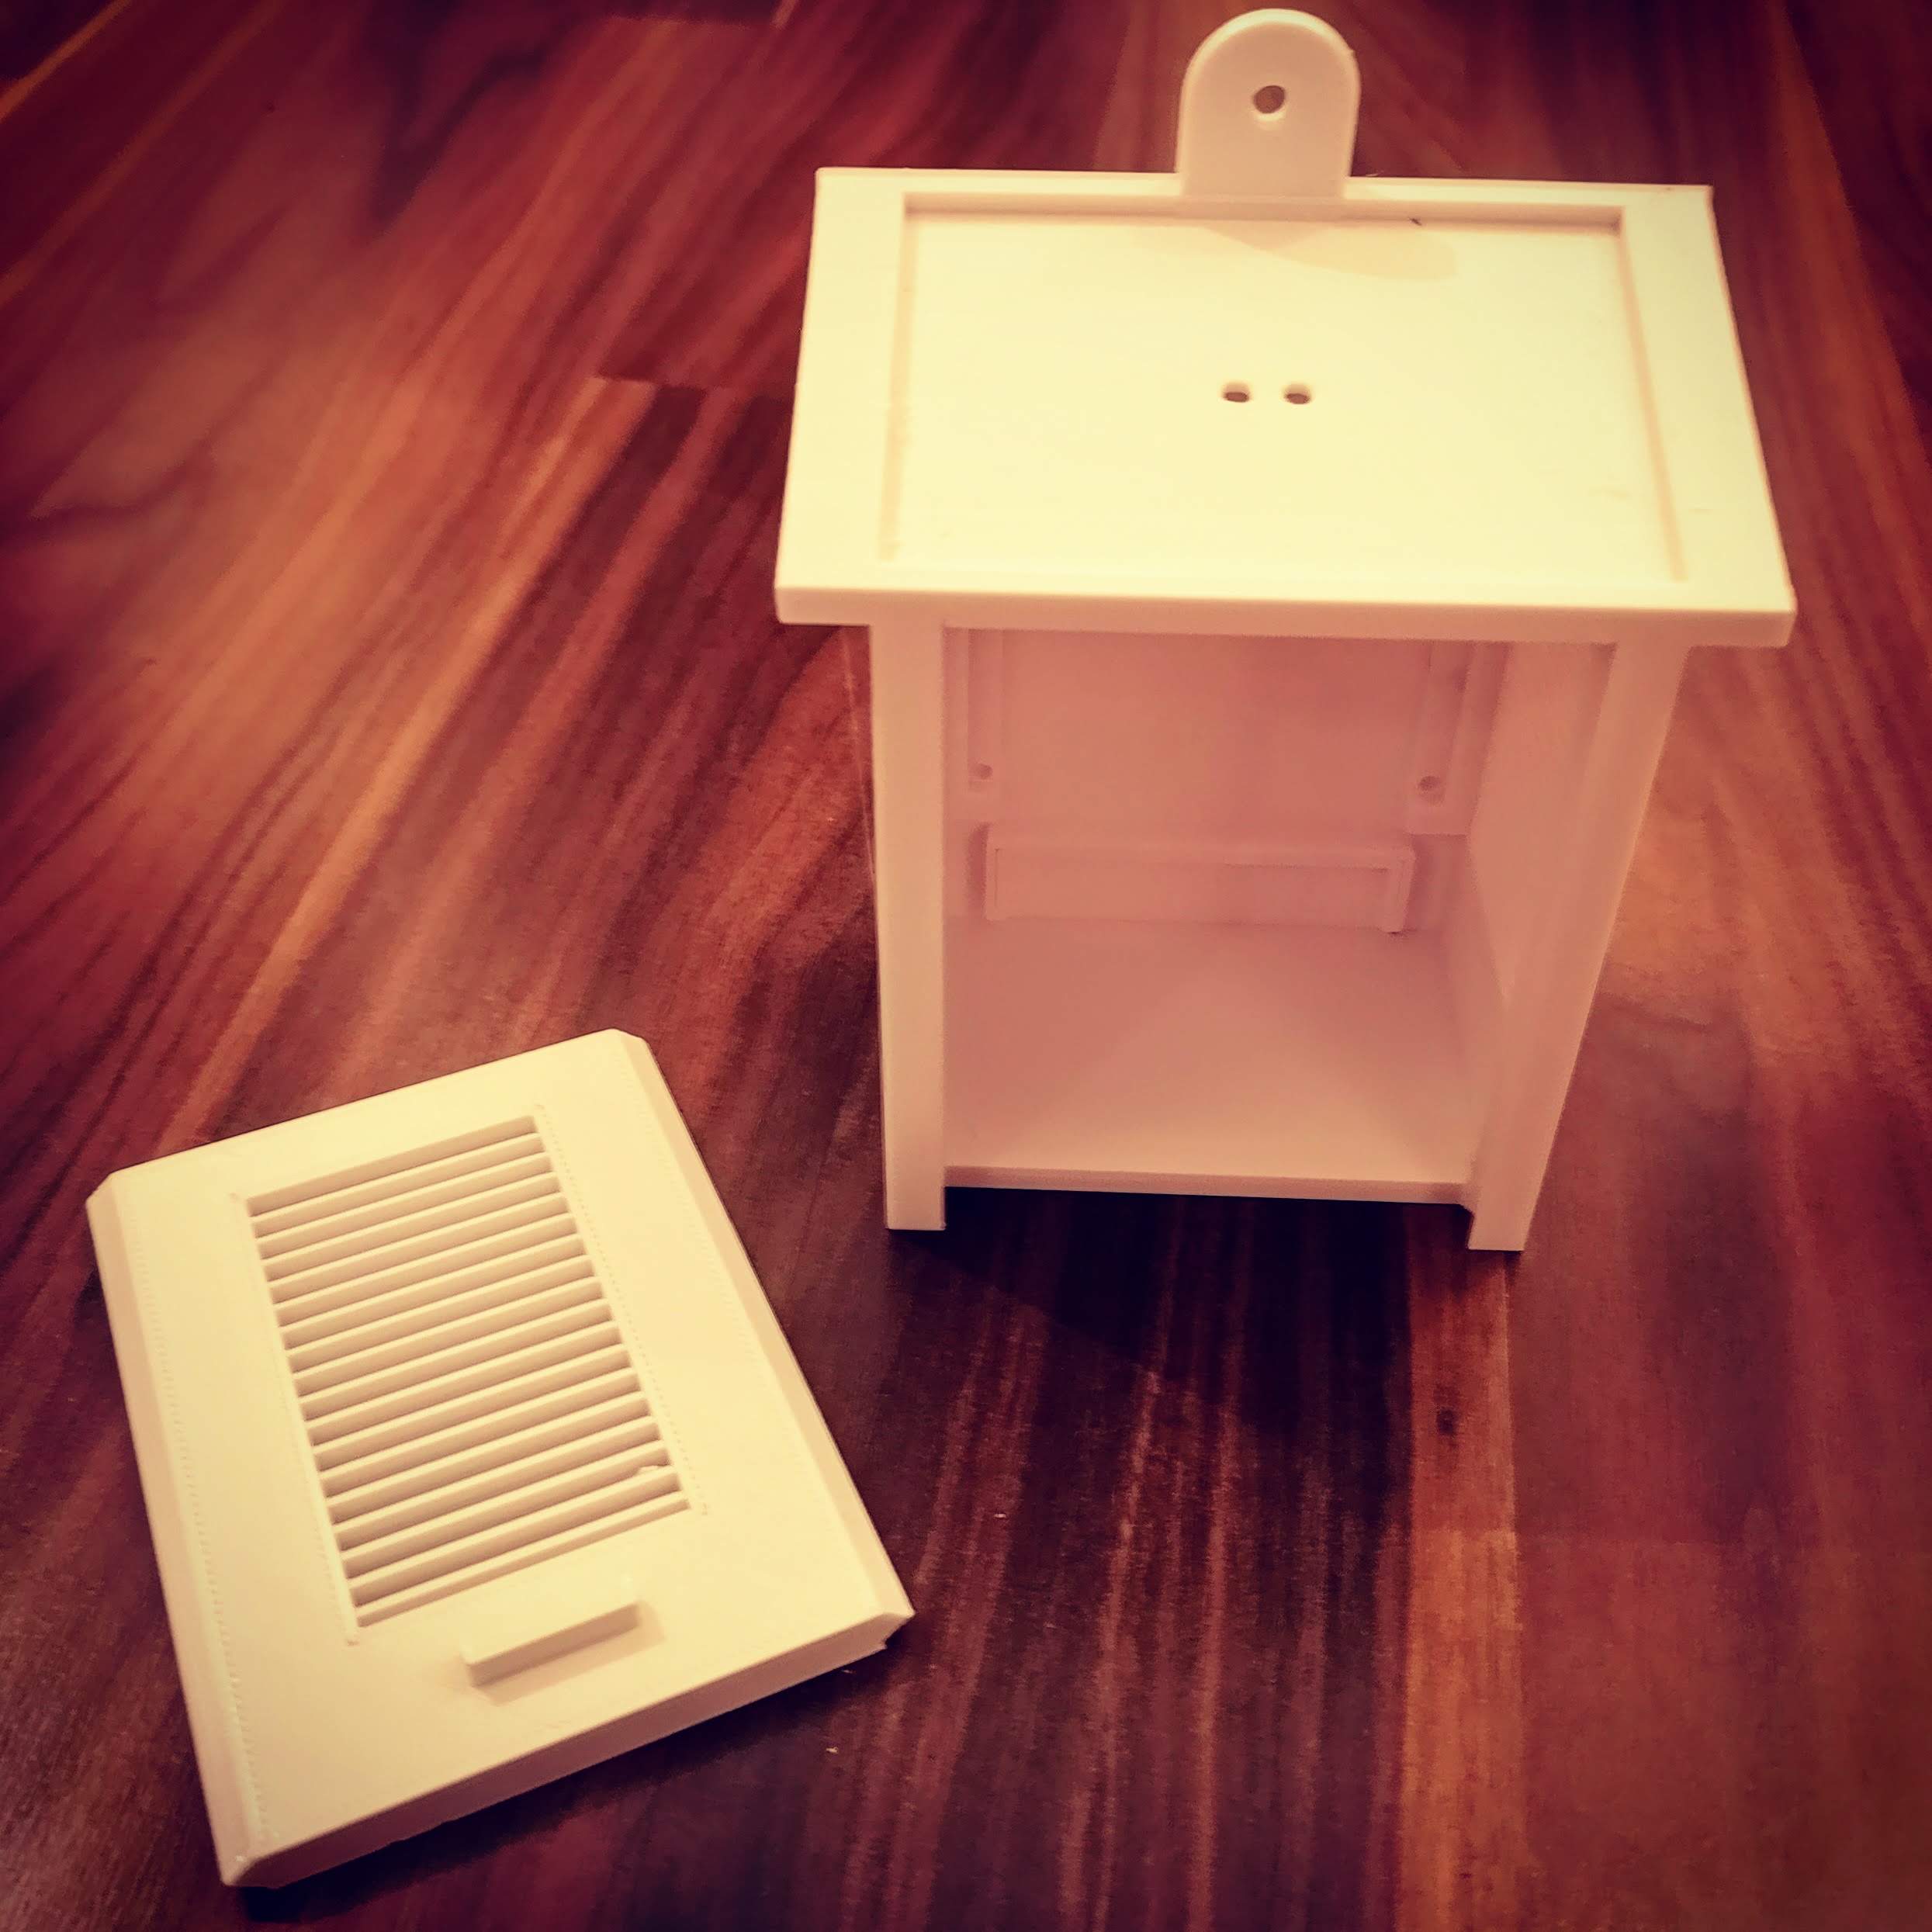
So, we have started work on a weather station to go out in our gardens. This is a collaborative project so anyone can join in at any time. To start with I have 3D Printed the small Stevenson Screen enclosure you see pictured below.
3D Printed Stevenson Screen
This housing will contain a Wemos D1 Mini Pro with external antenna. The Wemos D1 is an ESP8266 (or ESP12) based device. It is fully Arduino compatible and has wifi with external antenna.
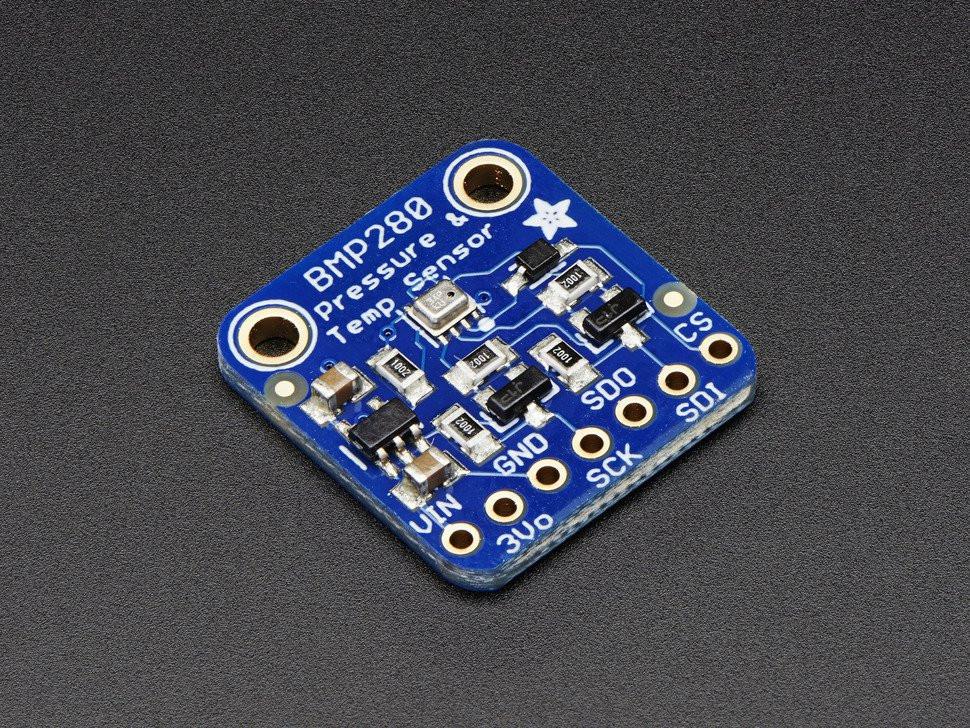
Connected to the Wemos will be the various sensors for the weather station. To start with we have added a BMP280 which is a combined temperature, humidity and air pressure sensor. The data from this sensor is being sent over wifi to both ThingSpeak and also an app created in Blynk to show the various readings.
Blynk App
Over time we will add various other sensors, such as wind speed and wind direction. I already have a few ideas how to build these using magnets and hall effect sensors.
Also, we will add rain gauges, UV, light, plus some environmental monitoring sensors such as CO2, dust particles and so on.
I shall blog about updates to this project as we go. It will no doubt take up to 6 months to complete.
For years i’ve been wanting to own my very own arcade game cabinet, like Space Invaders, Pacman and so on. However, these things cost a small fortune and not only they take up a lot of room. Nice to have if you own a large house with plenty of spare room. Then, not so long ago I heard about the RetroPie project. The RetroPie enables you to turn a Raspberry Pi into a retro gaming machine. You can then attach a joystick or game controller and play any retro games you are able to obtain the roms for. Others take their retropie to even greater heights by building a custom built arcade cabinet for it, complete with arcade joysticks and buttons, to make it look like a genuine arcade gaming machine.
When I heard about this I immediately decided I was going to build one. Due to size constraints I did not want to build a full sized cabinet so instead opted for a tabletop cabinet only, in other words only the top section of a standard arcade cabinet. I also wanted the controls to be for two players. At first I was going to design my own cabinet but came across this instructable for a two player bar-top cabinet so decided to use this as a base for my cabinet design. I wasn’t going to follow it rigidly but it was a good starting point.
First I had to decide on a display, I decided to purchase a raw display module rather than use a PC monitor. This is the cheapest way to buy a brand new display without the additional hardware that goes with it. The display I chose was 17″ which was a good size for most games and close to the screen size of a genuine arcade cabinet game. This kind of display requires a VGA adapter board to enable you to interface it with the Raspberry Pi.
Next I had to decide on buttons. I chose 6 buttons per player, plus an additional two buttons per player for 1/2 player select and start. I purchased a two player set of illuminated buttons, plus a Xin Mo 2 Player USB Interface from Ultracabs. These come with pre-crimped wires and the USB cable.
For sound I chose a cheap Chinese stereo amp with speakers from eBay. The advert claimed it was 100W but I knew this was total nonsense. They were cheap so what the heck. Most of the games I would be playing were only 8 bit retro sound anyway so there was no need to go for a high quality sound system.
Finally I needed some power supplies with enough current to power the Pi, display, illuminated buttons and sound system.
The cabinet was going to be made from MDF and the build started at a Medway Maker session on the 30th June. We set up the tools out in the garden, as it was a nice hot sunny day, and set about cutting and sanding the MDF. Tom Sparrow kindly loaned me a bunch of clamps and his very nice router to do some parts. It took me until 23rd July to completely finish the cabinet and start painting it. It was primed and painted black. The plan is to eventually cover it in graphics and acrylic sheeting to give it a real arcade look (plus to protect it) so the aesthetics are not that important at this stage.
The wiring spaghetti explosion underneath BEFORE the additional wires for the button lights were added.
Next came the task of fitting and wiring up all of the buttons. This didn’t take too long despite the fact it looks like an explosion in a wire factory underneath. These were hooked up to the Xi Mo interface which in turn was connected to the Pi. The display was fitted into the cabinet along with the associated VGA interface and power supply. Finally the sound system was fitted. The Raspberry Pi 3B+ was installed along with the RetroPie image on SD Card I had previously installed. Once everything was in place the cabinet was fired up and worked perfectly first time.
mde
cof
The RetroPie interface is a little clunky to use with just a joystick and buttons (its a lot easier with a keyboard) but you get used to it after a while. There are no games on the RetroPie image, you need to find these yourself. There are plenty of websites dedicatated to preserving old retro game roms and you can get them from there. I was mainly interested in the very old 80’s retro style game classics like Pacman, Galaxians, Defender, Space Invaders and so on so these were the first to be installed.
mde
I did have a lot of trouble with the Xin Mo controller interface getting it to work with the RetroPie as a two player controller. I spent many hours on this and eventually gave up. Apparently they don’t work well on Raspberry Pi 3’s but will work OK on older hardware. The technical info for the unit says it should work, but I just could not get it to work easily. In the end I simply bought a second interface. With the two Xin Mo’s plugged into the Pi they are recognised as two separate controllers and two player games work perfectly.
mde
Overall I am very happy with the build. However, in hindsight if I had to do it again I would have designed my own cabinet. Using someone else’s design is fine if you stick to that design rigidly. But if you want to do something slightly different with it then you start to realise the shortcomings in the design. Maybe i’ll build another one day.
mde
So, the arcade cabinet is up and running and works perfectly. But, the project is not complete. The cabinet itself will be covered in retro gaming graphics and acrylic to protect those. I will also add some black acrylic on various sections to make it look more professional. Finally, I need to make the illuminated marquee to go at the top of the cabinet. I have a neat idea for this so watch this space.
If you want to see the cabinet in person or have a play of some old school retro games on it then pop along to any Medway Makers meetup. The RetroPie will always be set up ready to play when you get there.
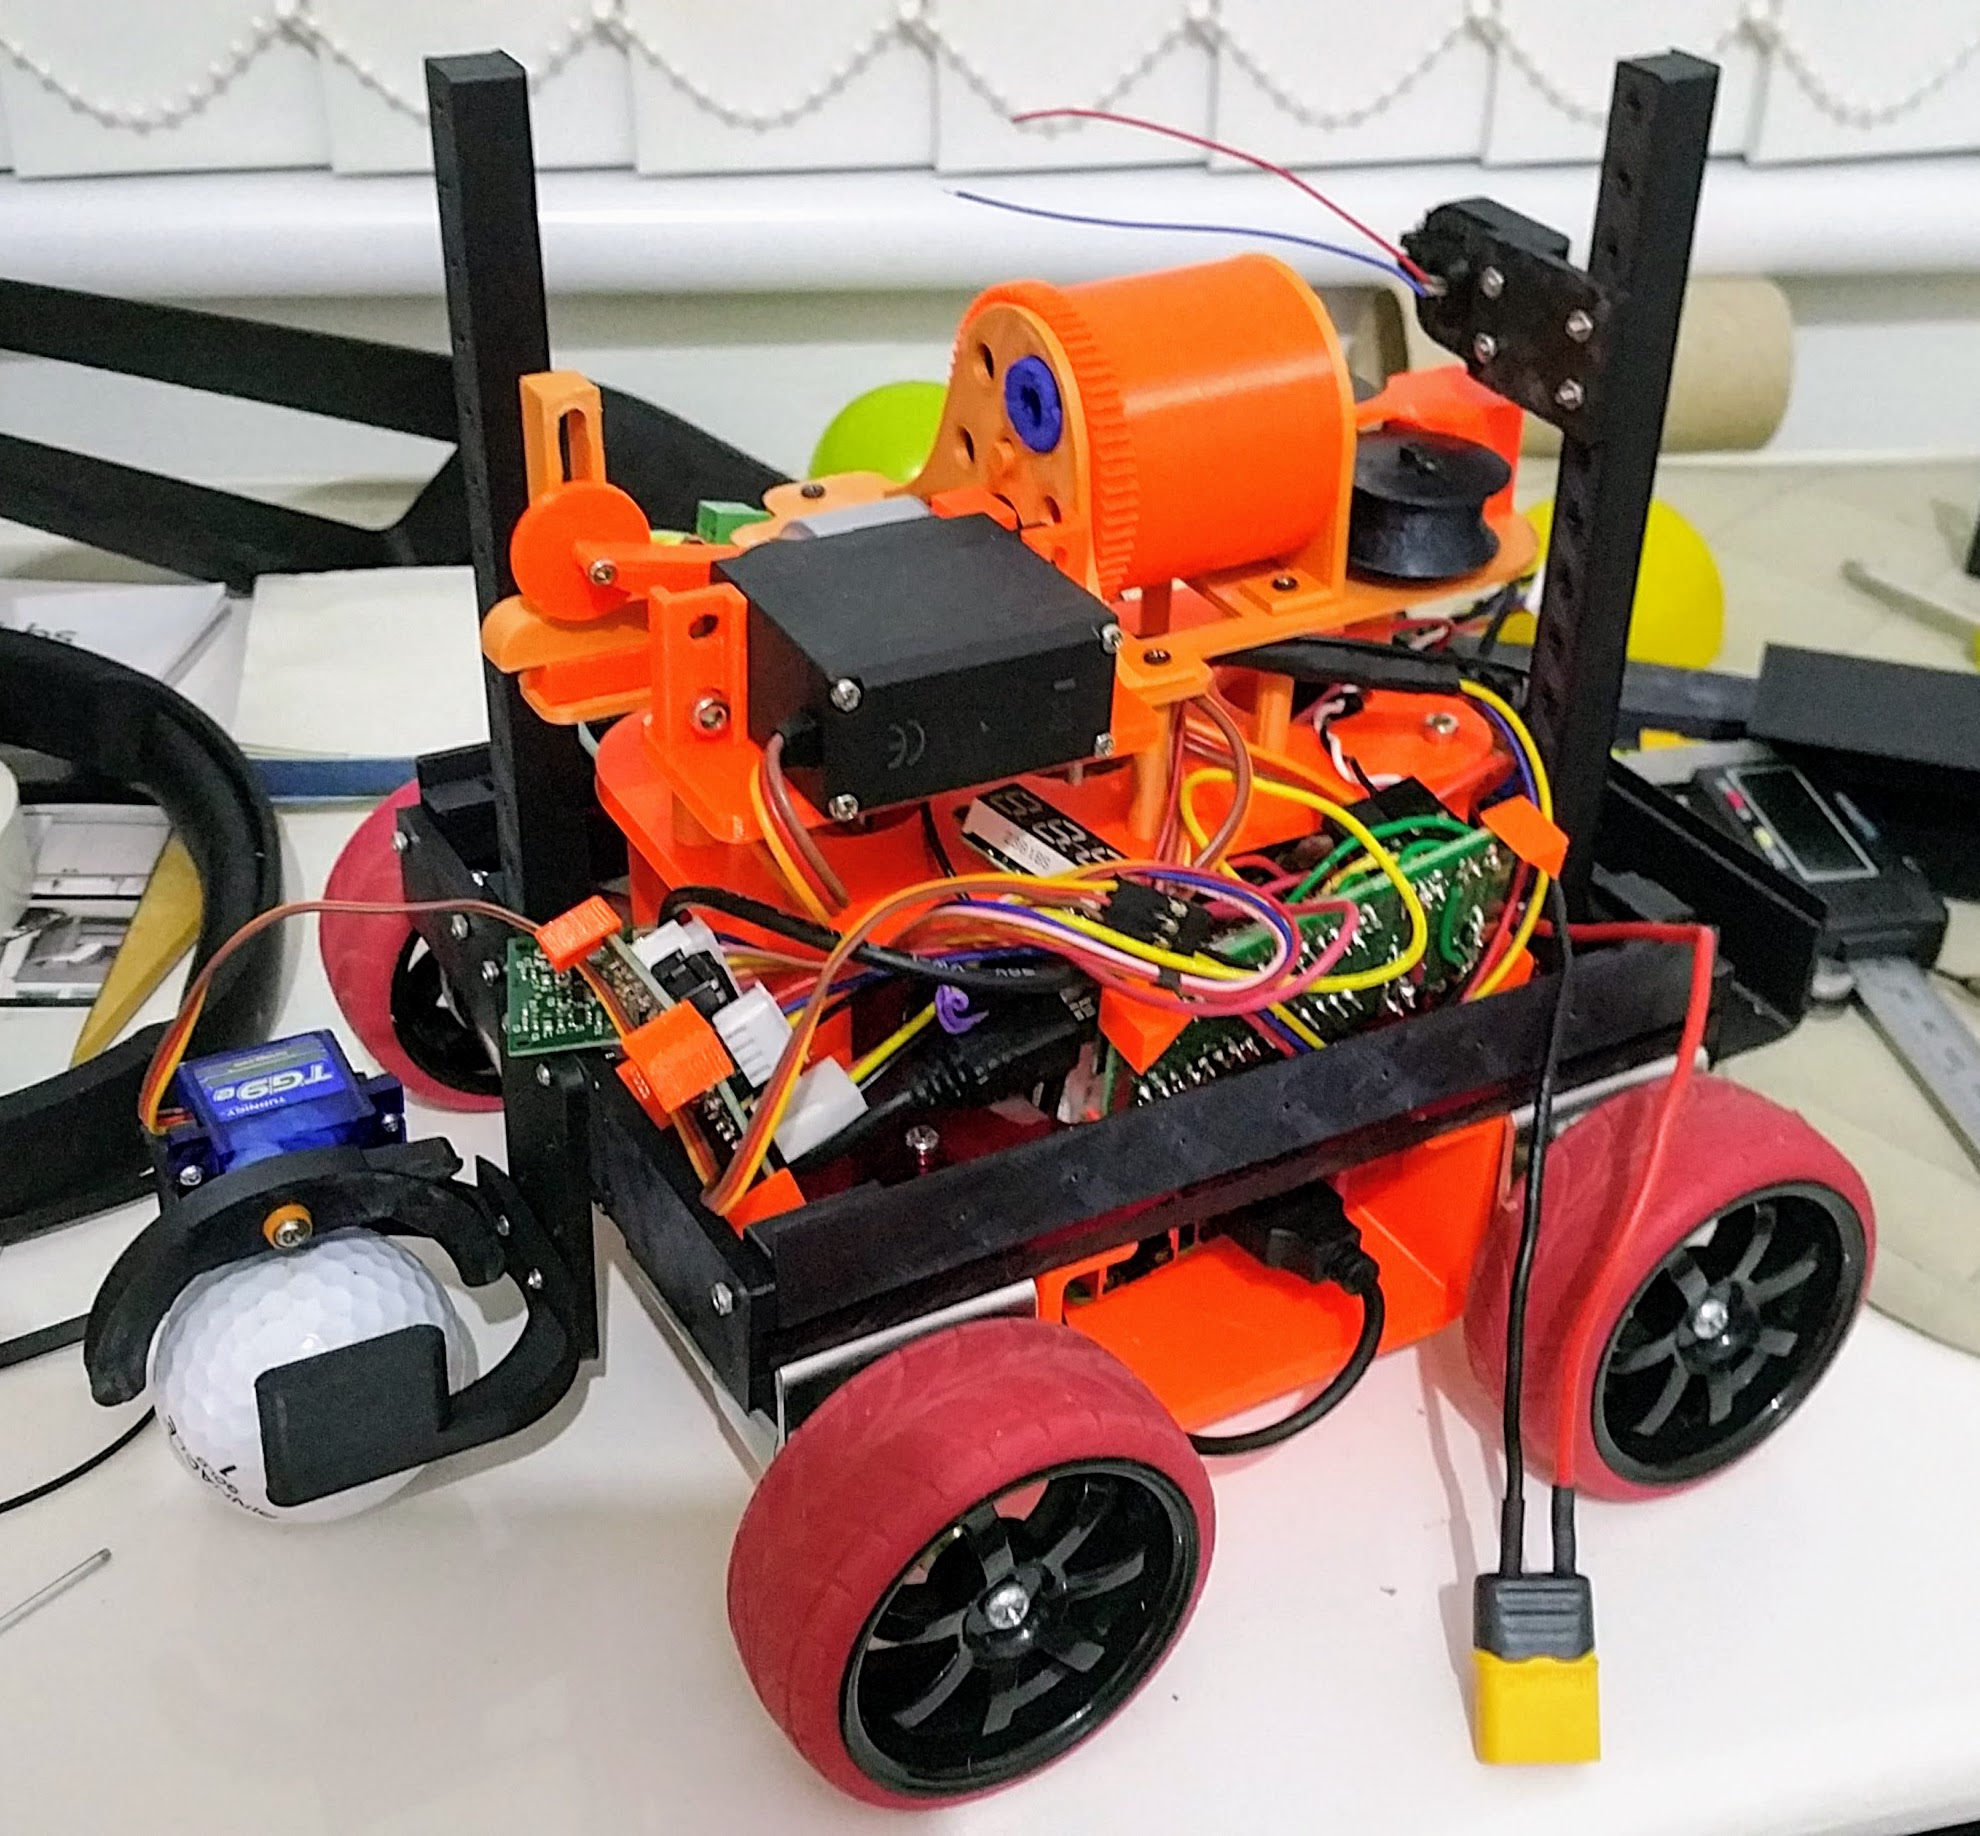
So it is now just 6 days to go until the Sunday of Pi Wars. This is the last weekend to get things sorted before the big day. So we’ve been frantically 3D Printing and testing.
For the Somewhere Over The Rainbow challenge we were concerned about the way the course was going to be lit. There was no confidence that illumination would be even and that our robot would not cast shadows onto the ball (It’s a pretty tall robot). So we have added some LED lights to the camera side of the robot to hopefully give the camera a better view and to ensure the robot is not thrown off by shadows. We have yet to test this though!
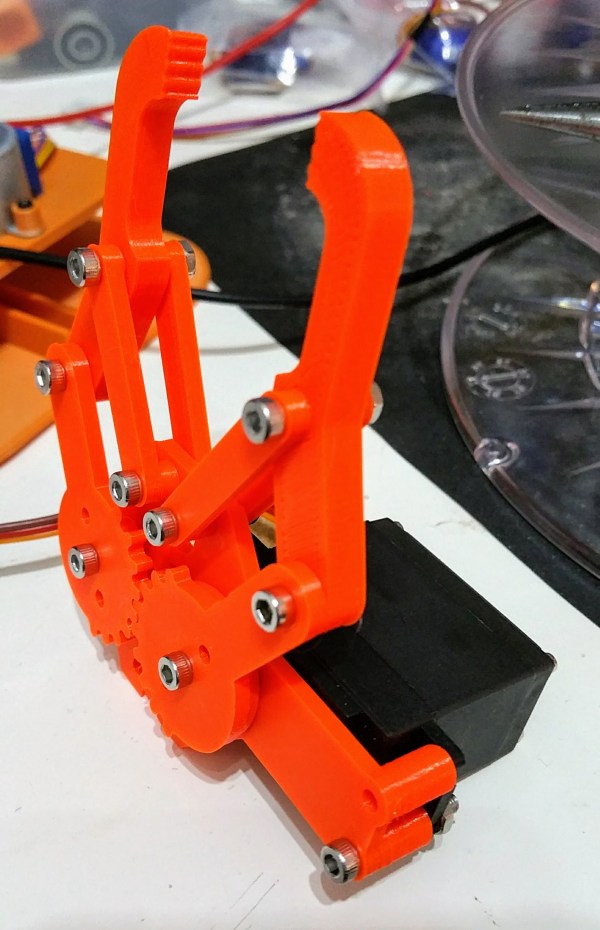
The golf attachment has been through a few revisions as it was found to be very difficult to control in testing. The printer is beavering away right now printing out the new parts.
The Duck Shoot stuff is all working great. Shame it is taking up the majority of the internals of the robot though. Space is tight inside there!
The Minimal Maze challenge is working fine. We are just praying for no bright sun on the day as this will ruin everything as we have not had time to fit any backup sensors.
The straight line speed test works fine. We are not going to be the fastest robot out there (I’ve seen some videos of super fast competitors). However, we are confident we will get from one end to the other without touching the wall so will at least collect some points.
Finally there is the obstacle challenge, which is mainly down to practise as well as Pi Noon.
All in all we have had a bloody good crack at this competition and although we are not fully prepared as we hoped we would be we should be a strong team. Fingers crossed for the day. It will be great fun and we are all looking forward to it. I am personally looking forward to getting my life back past Pi Wars and have the time to get on with some of my own personal projects. The last 8-9 months or so has been dominated by Pi Wars and it will be nice to finally get it done and get things back to normal.
However, I now have some fantastic new skills since starting the Pi Wars competition that will be invaluable for some of my up and coming projects and for that I am very grateful.
Hope to see you all in Cambridge next week. Please come along and support us !
With just 10 days to go till the Sunday that we are competing in Pi Wars, panic is now setting in. We have to admit we are not completely ready and really need another few weeks to get things right. However, we don’t have that luxury. There are 10 days to the competition and considering 6 of those are work days meaning only a few hours in the evening are available during the week, plus once we set off for Cambridge on the Friday any chance to work on the robot after that will be very limited indeed. So this coming weekend is really the last chance to do as much as possible on the robot. After that, time has ran out.
Where did all of that time go? It was way back in 2017 that work started on the robot and thinking we had plenty of time. All of a sudden we are in headless chicken territory and needing more time.
So this is a brief status update on where we are as of today :-
Chassis – Happy with the chassis and we’ve added a little bit of bling to make it look less like an RC car and more like a robot.
Straight Line Speed Test – Not confident about this challenge. Using ToF sensors only so we are weather dependent on this one. No time to add in backup sensors.
Maze – Same as above. Good results in testing but praying for overcast skies on the day.
Somewhere Over The Rainbow. – Robot performs well in testing. Again, lighting conditions on the day that differ drastically from those in testing may be our downfall.
Obstacle Course – This one is entirely down to the skill of the driver. The robot is fast and maneuverable. Hoping to do reasonably well on this one.
Pi Noon – As above. But we are up against formidable opponents so don’t expect to win. Hoping to get at least half way through the rounds though.
Golf – Attachment works reasonably well in testing. Luck and driver skill will need to be on our side.
Duck Shoot – Hoping to do well in this one. We have a nice Nerf Cannon. But then so do other teams so again, speed and luck are required here.
Blogging – We’ve definitely done better than most teams as a lot haven’t even bothered. Hoping for good scores here.
Artistic Merit – Hoping for some points here as we’ve put some effort into making it look good.
Technical Merit – Hundreds of hours have been spent in Fusion 360 and with the 3D printer on the robot. Almost every single plastic part on it was designed from scratch with many iterations in the R&D phase till we had working versions. The Nerf Cannon in particular went through many changes till we got what we wanted. Hopefully high scores here.
So, we are not expecting to win any challenges, but will be trying our damnedest to do so. No matter how we do on the day, I am sure it will still be great fun and I am walking away with some great new skills with Python, OpenCV, Fusion 360 and 3D Printing that will be very useful for up and coming personal projects and those with Medway Makers. It will also be great to put some faces to names of those we have been speaking to on the Pi Wars Discord channel and on Twitter. One thing I’ve loved about the active guys and gals on Discord (not including the ‘lurkers’) is the willingness to share information and help each other, even between competing teams. This sums up the spirit of Pi Wars and the Raspberry Pi community as a whole and I applaud every person involved in this great hobby.
It is now only 35 days to go until the Sunday Pi Wars day and the pressure is mounting. The reality is, we need more time, another 3 months would be great. The reality also is, we don’t have that luxury. Pi Wars is in 35 days whether we are ready or not.
We made some good progress on the Nerf Cannon this weekend and (finally) have a design we are happy with after many iterations. The gun has plenty of power and the addition of the laser sight will help with aiming. The problem now is finding where to mount it. The chassis is a total mess and needs sorting out. So, I am frantically printing out parts to hang things under and off the sides of the robot to make more space up top to mount the Nerf Cannon and Pi Camera. The attachments for the golf course and the maze sensors will go at either end and around the sides.
We are getting there slowly but things now need to pick up pace. Tom has been busy working away building our test courses whilst Mike cracks on with the 3D printing and coding. Considering it is only a 2 man team, we’ve done really well and have a half decent robot. Looking at what some of the other teams have built it is clear we are up against some very tough competition. As our first entry into Pi Wars as a maker-space we do no expect to come near the top 10 but will do our best to get as many points as we possibly can. We have certainly learnt a great deal and will be far better equipped to tackle the competition again if we decide to enter another year. Plenty of valuable lessons have been learnt.
However, no matter how we do I am sure it is going to be a great fun day on 22nd April. Even if we don’t win any challenges we’ve learnt loads of new skills and I am now very proficient at building working parts in Fusion 360. The skills I’ve learnt in the Pi Wars build will go a long way towards my own personal ‘Earth Rover’ project which I plan to start once Pi Wars is out of the way later in the year. Tom is picking up tons of Fusion 360 skills which he plans in using to assist with his kids school projects. These are the main rewards of entering a competition like this, the experiences you can take away from it and put to use elsewhere in your life. We are really looking forward to Pi Wars. See you all there!
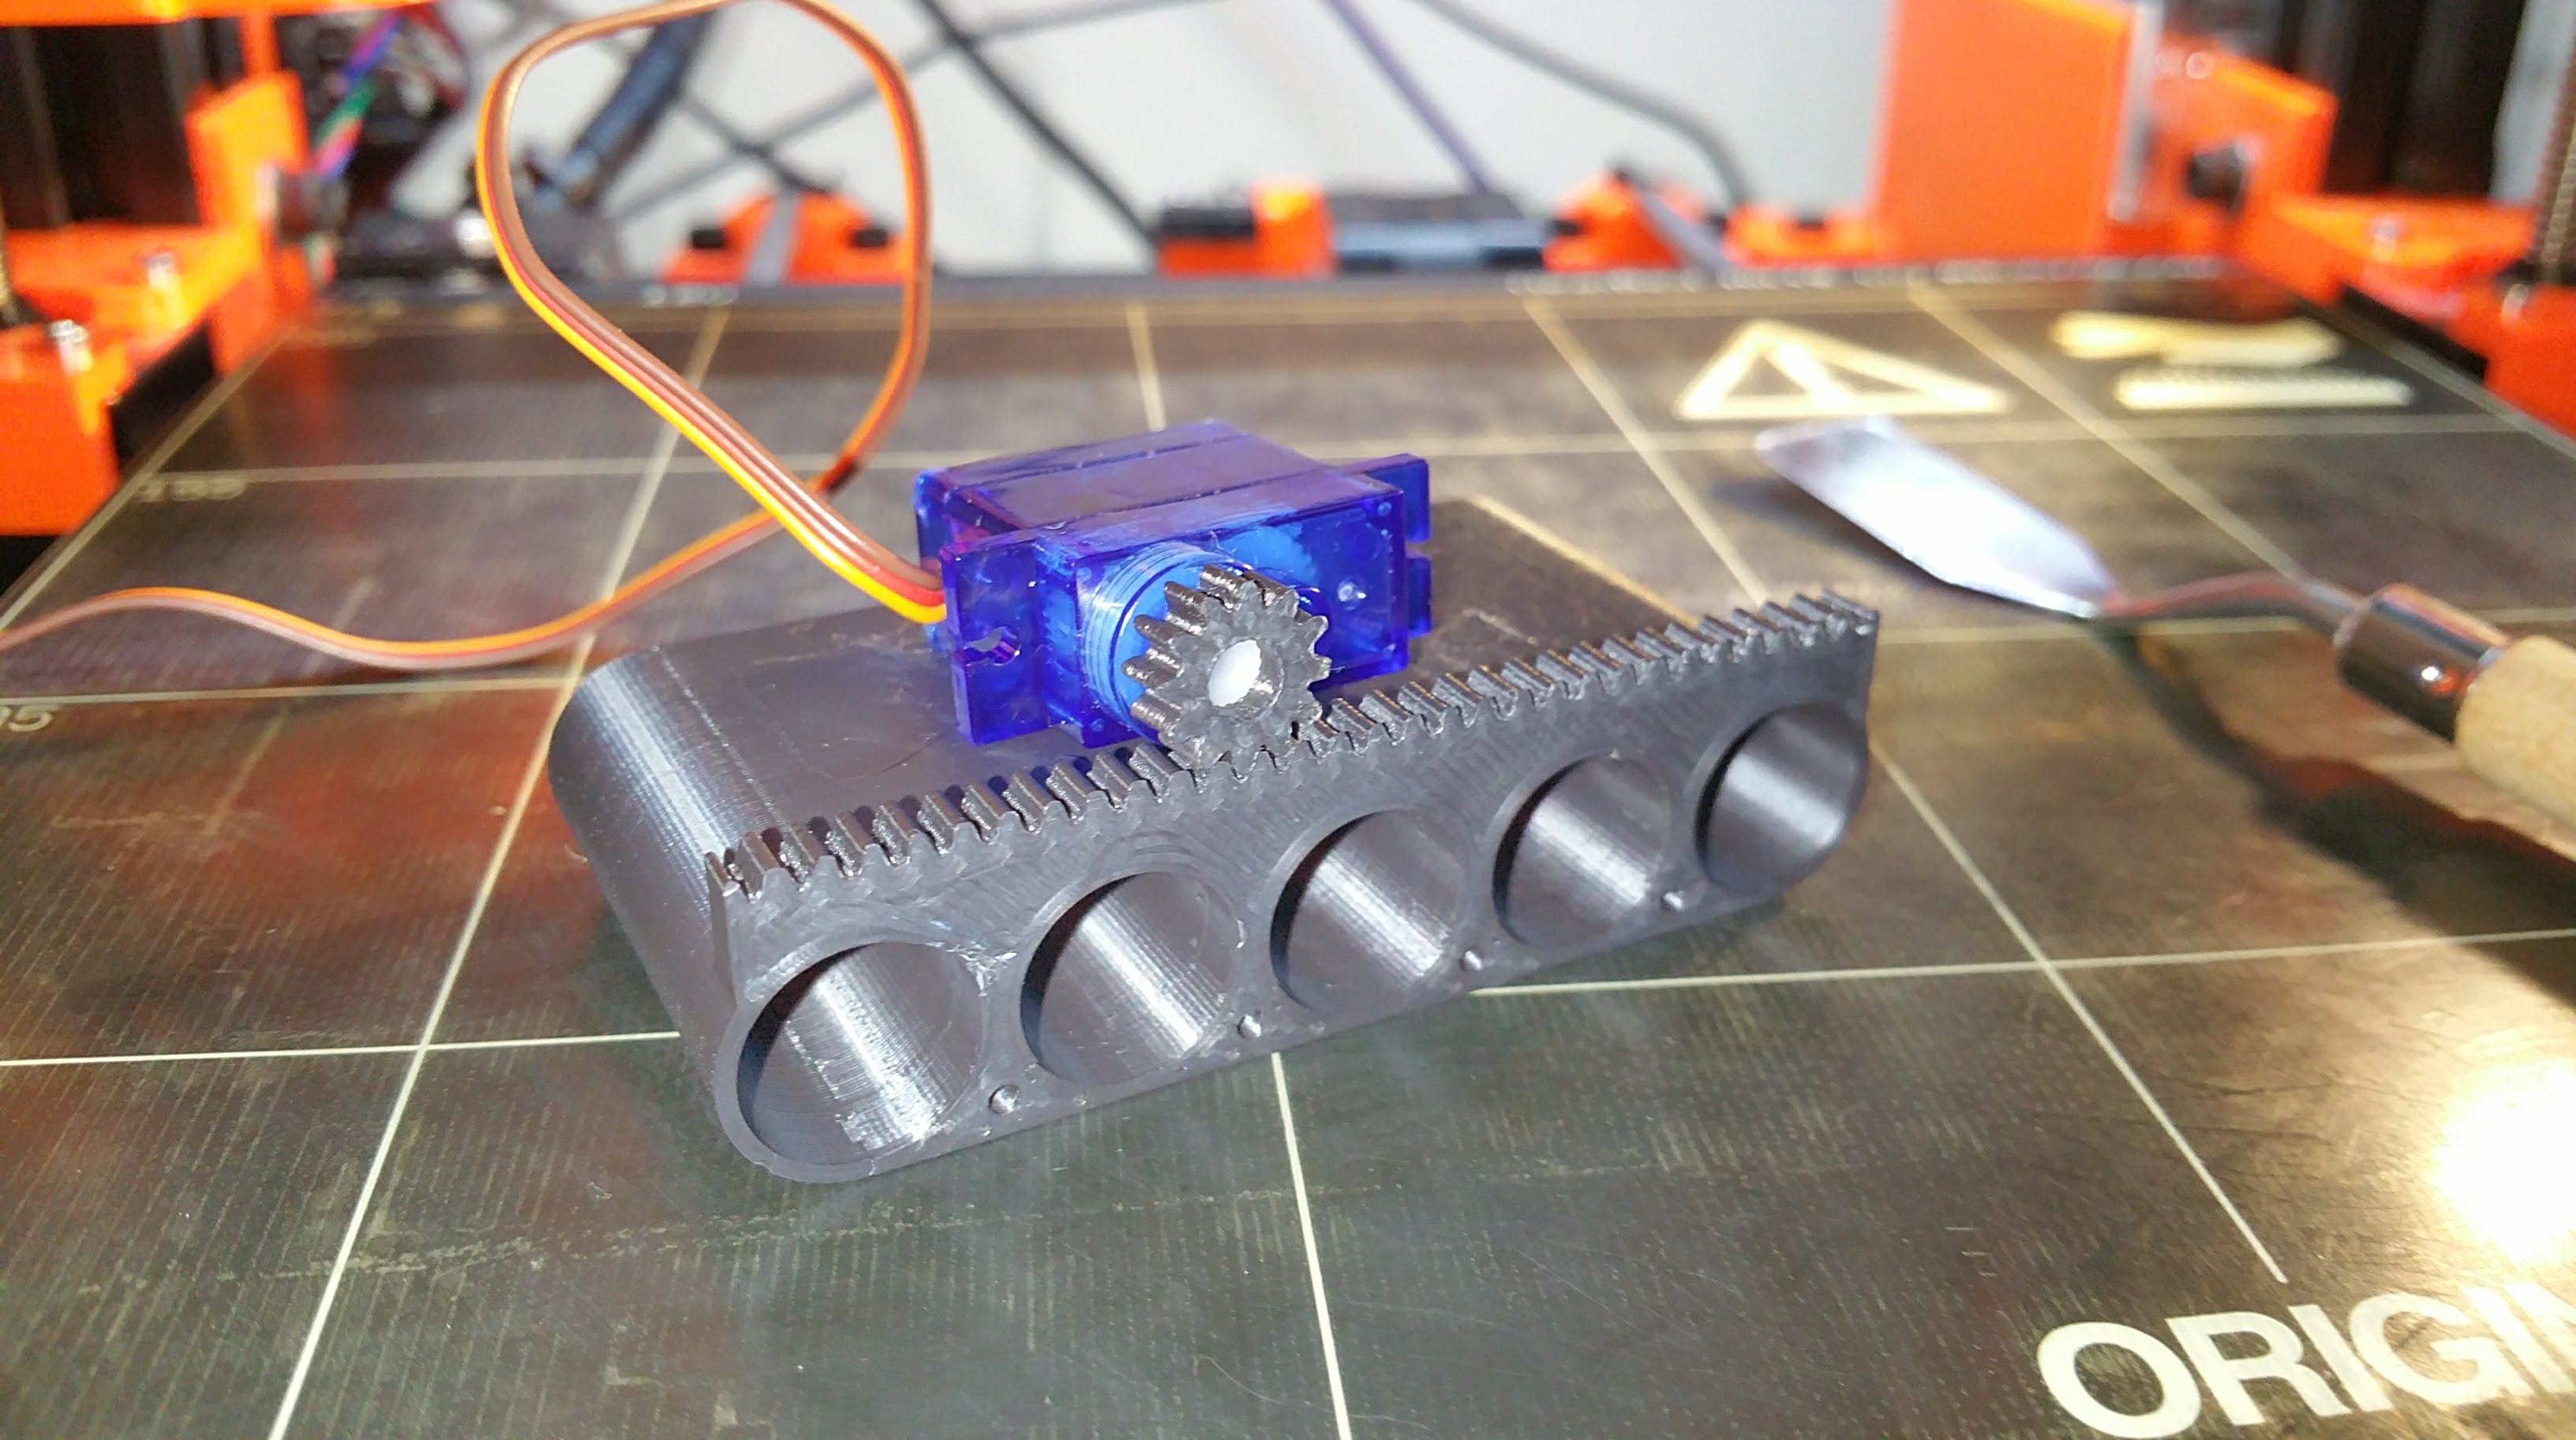
Over the last few weeks I’ve gone through several design iterations for the Nerf Cannon. This is mainly due to my insistence in trying to use a continuous rotation modded servo to move the darts into position. I have finally given in and used a stepper motor. This is something I should have done right from the start with hindsight.
However, the darts are now lining up perfectly with the gun barrel every time now and the 3D printer is busy beavering away printing out what I hope will be the final version of the gun. Once the gun is finished and fully working I shall post up a video of it in action.
I was saying to Tom yesterday that it is no wonder so many teams drop out of Pi Wars in the first few months. Pi Wars is hard. There is no doubt about it, they are not called “Challenges” lightly. Over the last month or so I have been designing, redesigning, printing and reprinting parts for the Nerf Cannon. We could have gone down the route that lots of other teams have gone down and hacked a Nerf gun, But we chose not to. Those solutions are not elegant, they look ugly as hell, and are not going to win many points for Technical Merit. We chose to design and build a Nerf cannon entirely from scratch.
This was hard for two reasons. One, it meant having to learn a CAD program to enable custom built 3D printed parts to be manufactured. Our chosen software is Fusion 360 as it is extremely powerful and allows entire assemblies of multiple parts to be constructed with relative ease. I have gone from a complete beginner in Fusion 360 to a competent intermediate user in the last few months and I am now producing complicated multi-parts devices.
The recent iteration of the Nerf Cannon for the Duck Shoot challenge is made of 13 separate parts. Secondly, once a design is constructed, there are then rounds of testing, tweaking the design or even complete redesigns, reprinting modified parts and so on. Perhaps if I wasn’t such a perfectionist I would ‘make do’ with an inferior solution, but I am keen to get it right. All the work is made much harder as the bulk of the technical aspects of the robot build fall on my shoulders. Fitting time in to get stuff done is tricky.
For the maze challenge, we have used the usual ToF and ultrasonic sensors and the robot is solving the maze in a very respectable time. This one was a lot easier than expected.
Next, we are going to be working on a solution for the golf challenge. I have a few ideas in my head and parts are on the way. The Obstacle Course and Pi Noon will need minimal work apart from plenty of practice as these are manually controlled challenges. Although we may program in some automation if time allows.
The Straight Line Speed Test will be a lot more challenging with the addition of the narrow section in the centre. This will require either slowing down when it gets there or a very efficient centering algorithm. Somewhere Over The Rainbow may prove challenging, we have yet to see.
Finally, at the moment the robot is ugly. It is a basic chassis with a spaghetti mess of wires on top. I would really like to design a nice looking chassis where all of the electronics are hidden away. However, time is running out and this will have to wait until last. There are only 11 weeks left until the competition. Tick tock tick tock !!!
Crikey, has it really been that long since the last blog post about Pi Wars? So, what have we been up to since the last post? Well, lots of things, but slowly. Progress on the robot is slow. There are only two of us doing the core work on the robot with Mike doing the bulk of the work on his own. Fitting this in around work and a personal life is tricky to say the least. Despite this we have made good progress.
We have a chassis size and shape that we are generally happy with. Time permitting, Mike would like to 3D print a custom chassis if possible. The motors, motor controller, wheel combination and control code works well and we see no reason to change any of this. The bulk of the hard work has been in designing the parts for the challenges and sourcing suitable sensors.
For sensors we have decided to go for a combination of ultrasonic and TOF IR sensors. So nothing ground breaking there as most other teams are doing the same.
For the Duck Shoot challenge we have decided to design and 3D print a firing mechanism from scratch. We could have hacked a Nerf gun I suppose but we want our robot to look good and be as compact as possible. We’ve come up with a nice compact design and the majority of the prototype parts have been printed and tested. A few more to go and then proper testing can take place.
We haven’t even started on the Over The Rainbow challenge yet or even the gold challenge. Time is slowly running out so we need to make this priority once the Duck Shoot parts are finalised.
We will take some photos of the progress so far over the coming weekend and post these up for all to see.
The 7 challenges for the 2018 Pi Wars challenge differ slightly from before. There are a 3 autonomous challenges and 4 that are remote controlled.
For the remote controlled challenges we have: Slightly deranged golf, Pi noon, The obstacle course and The duck shoot.
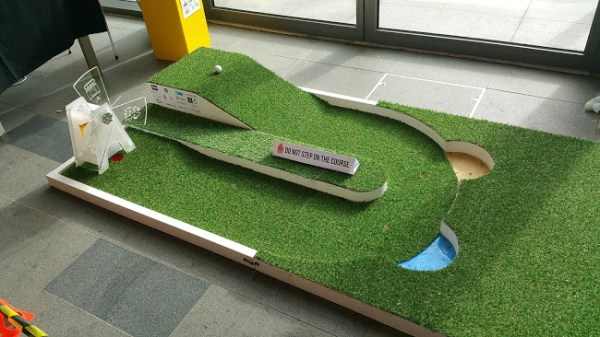
Slightly Deranged Golf
The golf course is the same course as last year but with a slightly less steep angle for the initial ramp. This is a tiny golf course but has a ramp to contend with at the start, plus a 180 degree u-bend with 2 hazards, then another ramp with a moving windmill before the hole.
A lot of people had trouble with this challenge last year due to: a) the ramp, balls came loose from holders, etc. Having a way of encapsulating the ball on any angle would be beneficial. b) the hazards, the ball going down the ramp would inevitably go into a hazard unless you were able to aim the ball at a wall and make it bounce off at 90 degrees prior to the u-bend. The ball has to either kept in captivity throughout the course or aimed at speed towards a wall prior to the hazard. c) the artificial grass, this made traction difficult for robots with omni-wheels or small wheels. Go for tracks or larger wheels. d) the narrowness of the course. Several robots were very large and found navigating the bend tricky. Smaller robots fared better here. e) The windmill. The blades of the windmill were turning and so the ball had to be fired at the hole at just the right moment. Some kind of solenoid or other device to propel the ball is advantageous.
Pi Noon
For this challenge you mount a spike on your robot with 3 balloons attached. The aim is to use your spike to pop the opponents balloons. This challenge is won by a combination of luck, driver experience and robot agility. The robot has got to be able to move quickly and do such maneuvers as spinning on the spot and quick reverses. The driver must be well experienced in controlling his robot. Practice, practice, practice. Ideally find someone else with a similar robot and practice against them.
The Obstacle Course
Again, this course is down to driver experience and robot agility. The course is not known until the day of the competition and you get one and one only attempt at the course. The aim is to get through the course as quickly as possible and attempt every obstacle. Points are deducted for rescues or failing an obstacle. Winning robots were not too large, quick and agile with drivers who had obviously practiced well.
The Duck Shoot
The above 3 challenges are the same as last year (apart from the obstacle course being a different course). The Duck Shoot challenge is entirely new. The aim is to fire 5 soft projectiles at 5 duck targets from behind a line. Most people will undoubtedly go for Nerf Darts and either hack an existing Nerf gun or design a firing mechanism from scratch. Again, driver agility and experience is essential here to aim the ‘gun’ at the target. I like this challenge. It is the first time projectiles have been allowed. Coming up with a nice and reliable mechanism that can fire the darts will be an interesting challenge.
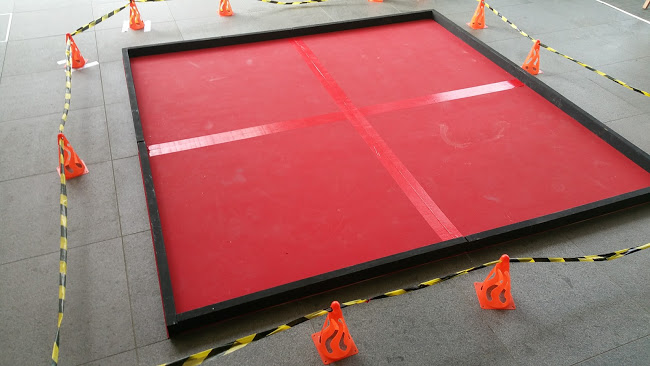
Straight Line Speed Test
The straight line speed test is the same course as last year. However, they have added a narrow section halfway down the course. This is to prevent robots simply hugging the left hand wall and to force a more intelligent way of remaining central. There will be an addition of a white line down the centre so either a line sensor or use of a camera and OpenCV will be essential here.
The Minimal Maze
This is the exact same course as last year with no changes. I think only a few robots successfully navigated the course last year so it is a valid challenge. It is essential for the robot to make its way through the maze as quickly as possible without touching the walls as the times for all 3 runs will be added together. Use of infrared and/or ultrasonic sensors will be required here.
Somewhere Over The Rainbow
This is the final challenge and an entirely new one. The robot is placed inside a square arena and has to detect and visit 4 coloured balls in the correct order. There will be now way to do this challenge without a camera and computer vision code (e.g OpenCV). This will be the most challenging of the challenges in my opinion and will require the most advanced code. I think a lot of people will fail this challenge. It will be interesting to see how people fare on the day.
There are an additional 3 challenges where points can be obtained: Blogging, Technical Merit and Artistic Merit. It will be worth devoting some effort in these areas where possible to get a few extra points.
So there you have it. The 7 (10) challenges for Pi Wars 2018. I really like these challenges. They are a combination of difficult and fun. There will need to be some very careful thought and planning on some challenges, especially the line test, rainbow and duck shoot challenges in my opinion. Planning, designing and building for the challenges are already underway. Keep your eye on this blog for details of our progress leading up to April 2018.


 o ensure the robot is not thrown off by shadows. We have yet to test this though!


 For this challenge you mount a spike on your robot with 3 balloons attached. The aim is to use your spike to pop the opponents balloons. This challenge is won by a combination of luck, driver experience and robot agility. The robot has got to be able to move quickly and do such maneuvers as spinning on the spot and quick reverses. The driver must be well experienced in controlling his robot. Practice, practice, practice. Ideally find someone else with a similar robot and practice against them.
 Again, this course is down to driver experience and robot agility. The course is not known until the day of the competition and you get one and one only attempt at the course. The aim is to get through the course as quickly as possible and attempt every obstacle. Points are deducted for rescues or failing an obstacle. Winning robots were not too large, quick and agile with drivers who had obviously practiced well.
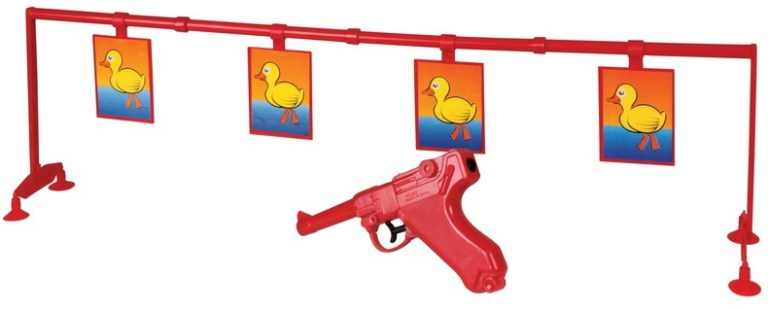 The above 3 challenges are the same as last year (apart from the obstacle course being a different course). The Duck Shoot challenge is entirely new. The aim is to fire 5 soft projectiles at 5 duck targets from behind a line. Most people will undoubtedly go for Nerf Darts and either hack an existing Nerf gun or design a firing mechanism from scratch. Again, driver agility and experience is essential here to aim the ‘gun’ at the target. I like this challenge. It is the first time projectiles have been allowed. Coming up with a nice and reliable mechanism that can fire the darts will be an interesting challenge.
 This is the exact same course as last year with no changes. I think only a few robots successfully navigated the course last year so it is a valid challenge. It is essential for the robot to make its way through the maze as quickly as possible without touching the walls as the times for all 3 runs will be added together. Use of infrared and/or ultrasonic sensors will be required here.
 This is the final challenge and an entirely new one. The robot is placed inside a square arena and has to detect and visit 4 coloured balls in the correct order. There will be now way to do this challenge without a camera and computer vision code (e.g OpenCV). This will be the most challenging of the challenges in my opinion and will require the most advanced code. I think a lot of people will fail this challenge. It will be interesting to see how people fare on the day.