Have you ever wanted to learn a new skill but didn’t know where to start? Maybe you’ve got a project idea bouncing around your head but lack the tools or the space to make it happen. Or perhaps you’re just looking for a way to connect with like-minded people. This is where maker spaces come in, and why they’re so important to communities like ours.
Maker spaces, like Medway Makers, are more than just workshops. They are vibrant hubs of creativity and collaboration where people of all ages and backgrounds can come together to learn, build, and share. They are built on a simple but powerful idea: that by providing access to tools, resources, and a supportive community, we can empower people to turn their ideas into reality.
A Place to Learn and Grow
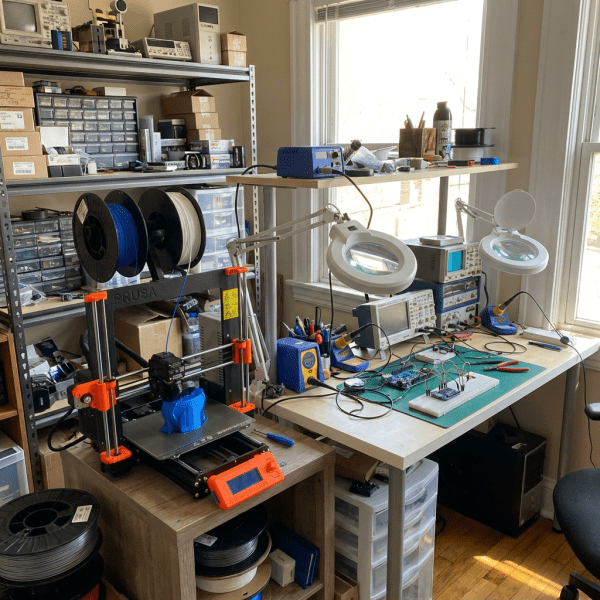
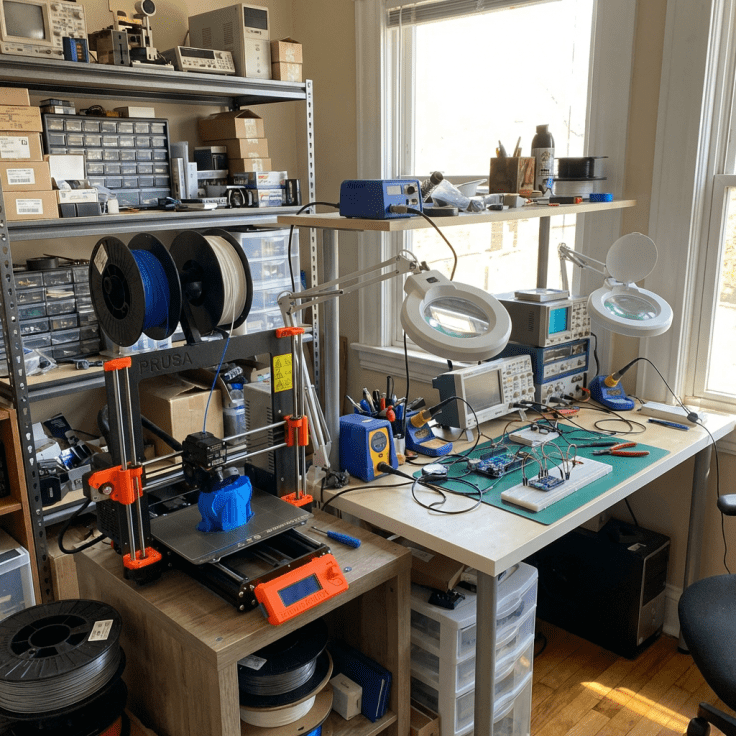
One of the biggest benefits of a maker space is the opportunity to learn new skills in a practical, hands-on way. Whether you’re interested in 3D printing, laser cutting, electronics, or even traditional woodworking, you’ll find the equipment and, most importantly, the people who can guide you. You don’t need to be an expert to walk through the door. The only requirement is curiosity. Many of our members have found a passion for things they never thought they’d try, from building custom PC cases to programming microcontrollers.
Collaboration and Shared Knowledge
Maker spaces thrive on collaboration. Instead of working alone in a garage or shed, you’re surrounded by people with different skills and experiences. This creates a natural environment for sharing knowledge. Got a problem with a project? Chances are someone nearby has faced a similar challenge and can offer advice. This kind of organic learning is incredibly valuable and often leads to new friendships and joint projects. I’ve personally seen members team up to tackle everything from complex robotics to restoring old electronics, all because they met and connected at the space.
Battling Loneliness
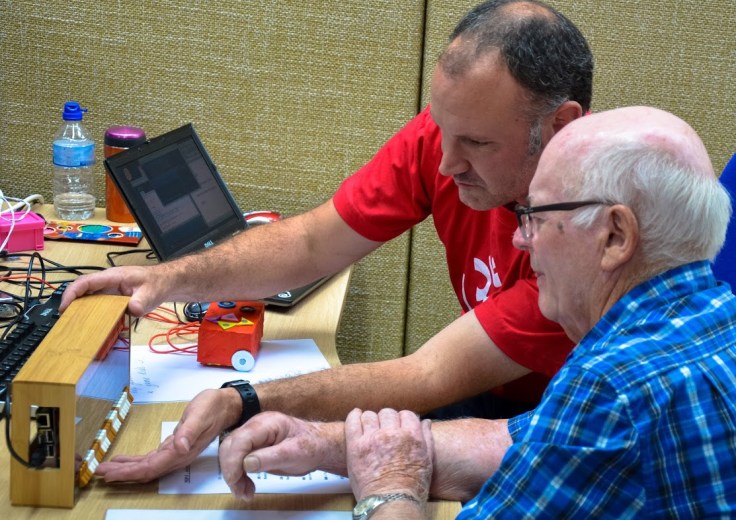
In an increasingly digital world, it’s easy to feel isolated. Maker spaces offer a tangible solution to this by providing a welcoming physical space for people to gather. For someone who might be feeling lonely, a maker space can be a lifeline. It’s a place to talk, to laugh, and to work alongside others. The shared focus on making and creating breaks down social barriers, making it easier to strike up conversations and form genuine connections. It’s a place where you can find a sense of belonging and a supportive community.
Ultimately, a maker space is a reflection of the community it serves. It’s a place where we can all learn, create, and grow together. So if you’ve been thinking about a project, want to learn something new, or simply want to meet some interesting people, come and see what we’re all about. You might be surprised at what you can achieve.
Whether you’re a seasoned expert in electronics, a skilled coder, or someone who’s curious about starting their journey into the world of DIY tech projects, Medway Makers offers a welcoming and inspiring environment to exchange ideas, learn new skills, and collaborate on exciting projects. From Arduino and Raspberry Pi to drone flying and digital fabrication, there’s something for everyone at our meetups.
No special equipment or prior knowledge of anything is required. Total beginners welcome.
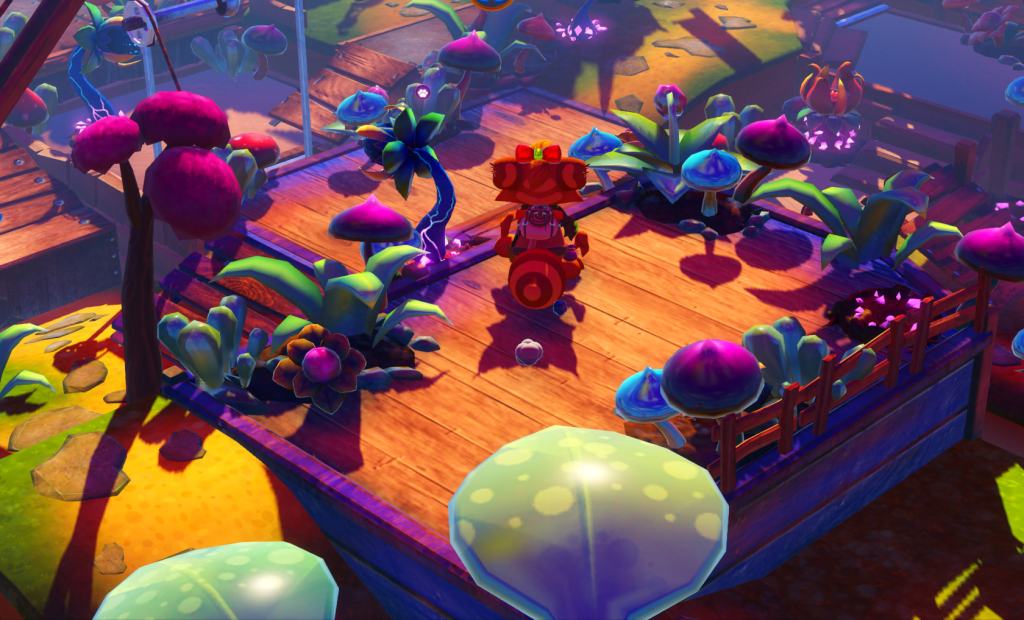
At Medway Makers, we’re not just a community; we’re creators, thinkers, and innovators. Some of our members have embarked on an exciting journey to master the Godot Game Engine, a powerful and user-friendly tool for game development. Whether you’re a seasoned developer or a newcomer eager to dip your toes into game creation, our group has something for everyone.
Why Godot? Godot is known for its versatility and ease of use, supporting both 2D and 3D game development. It’s an open-source platform which means it’s completely free to use—you can make your games without any licensing fees, and it offers a wealth of tutorials and resources that are perfect for beginners and professionals alike.
What’s Happening at Medway Makers? Join us at our upcoming meetup and dive into the world of game development! For instance, one of our members, Mike, is currently developing a 3D boat adventure game. This project is a great learning opportunity, covering complex topics such as water dynamics, buoyancy, friction, and the interaction of floating objects in a virtual environment. Through this project, members gain hands-on experience with real-world physics simulations and advanced graphical effects in Godot.
Get Involved! Whether you want to start your own project or collaborate with others, Medway Makers is the perfect place to share ideas, receive feedback, and push the boundaries of what you can create with the Godot Game Engine. Our meetups provide a supportive environment where you can experiment and learn alongside fellow enthusiasts.
Meet, Learn, and Create Don’t miss the chance to enhance your skills, meet like-minded individuals, and be part of a vibrant community pushing the envelope in game development. No matter your skill level, you’ll find something to excite you at Medway Makers.
Ready to make games and make friends? Come to our next meetup and see what you can create—and learn—in the wonderful world of Godot.
Have you ever had an incredible idea but lacked the skills to bring it to life? Ever wondered how professionals create intricate 3D designs for groundbreaking products? Well, this is your chance to dive into the exciting world of 3D design and modeling with Fusion 360!
📅 Save the Date! Join us at Medway Makers for an exclusive, hands-on Introduction to Fusion 360 session that will elevate your maker game to new heights!
🎟️ Why Should You Attend?
🌟 Beginner-Friendly: Never touched 3D modeling software before? No problem! This session is designed to accommodate complete beginners. 🌟 Comprehensive Learning: Learn to create 3D models, simulate real-world scenarios, and even venture into CAM and 3D printing capabilities. 🌟 Expert Guidance: Get step-by-step guidance from our knowledgeable instructor, Mike, who has a wealth of experience in technology and building. 🌟 Network: Meet like-minded individuals who share your passion for making, coding, and innovation. 🌟 Free Admission: That’s right, attending this enriching session won’t cost you a penny!
👩🎓👨🎓 Who Should Attend? Makers, hobbyists, students, professionals, and anyone with a flair for creativity and innovation are all welcome!
🎫 Secure Your Spot Today! Seats are limited, so make sure to grab your free ticket as soon as possible.
See you at Medway Makers, where your imagination meets the tools to bring it to life!
Get your free ticket to our events on EventBrite. Click HERE.
Are you curious about the world of coding but don’t know where to start? Have you ever looked at the matrix of code behind a video game or a website and wondered, “How does it all work?” Or maybe, you’ve thought, “Could I create something like this?”
If you’ve answered “yes” to any of these questions, we have the perfect event for you! Medway Makers invites you to our special gathering on Sunday, 20th August. It’s the perfect opportunity for anyone, yes anyone, to begin their journey into the fascinating world of coding.
Our primary tools are the Arduino, Raspberry Pi, and the Godot Game Engine – three very powerful, yet beginner-friendly platforms that have brought about some of the greatest innovations in technology today. They provide an excellent foundation for beginners and are also rewarding for those with some experience.
But, what if I have never coded before?
Great! Then you’re exactly the person we want to see. At Medway Makers, we believe that everyone can learn to code. In fact, the only requirement to start coding is curiosity and a willingness to learn. It may sound cliché, but with coding, every master truly was once a beginner.
What can I expect?
You’ll be diving right in, working hands-on with Arduino boards and Raspberry Pi microcomputers to create amazing mini-projects that actually work! These platforms are excellent for learning the basics of programming in a fun, practical way.
But the fun doesn’t stop there. You’ll also get to work with the Godot Game Engine. If you’ve ever dreamt of creating your own video game, this is your chance. Godot is a powerful tool that lets you create games right from scratch and it’s perfect for beginners.
Who will be there to guide me?
Our friendly community of Medway Makers is always ready to share their knowledge. Don’t worry if you get stuck, there will always be someone around to help you. You’ll be part of a collaborative and supportive environment, where making mistakes and learning from them is the norm.
Why should I start now?
There’s never been a better time to learn to code. With the increasing digitalization of our world, coding skills are more in-demand than ever before. Coding can boost your problem-solving skills, creativity, and even your career opportunities. Plus, it’s just incredibly satisfying to see your own creation come to life!
But, will I enjoy it?
Absolutely! Coding isn’t just about typing on a computer. It’s about bringing ideas to life, solving puzzles, and creating something from nothing. It’s about the excitement when your project finally works, and the satisfaction of knowing that you made it yourself.
So, come and join us on Sunday, 20th August, at Medway Makers. Bring along your curiosity, creativity, and a sense of adventure. Start your journey in the world of coding and prepare to have lots of fun along the way. We can’t wait to see you there!
No prior experience is required, just an interest in learning and a willingness to have fun. Take the first step on your coding journey with Medway Makers. Mark the date in your calendar, and we’ll see you there!
Discover the joy of coding. Unlock a world of digital possibilities. Join the makers. Your journey starts with us, at Medway Makers.
Recently our leader Mike has been getting back into game development using the Godot Game Engine after learning it a year or so ago. Godot uses a node based system with scriptable objects meaning each object in the game can be programmed with its own script to make it do something, e.g. player, background, enemies, power-ups, etc.
The language Godot uses is called GDScript which is very much like Python in its syntax. It is easy to learn and intuitive.
At the moment Mike is trying to recreate some classic games using Godot such as Space Invaders and Centipede. If you wish to see what Mike is up to or to learn game development yourself using Godot then come and see us at our next social meetup (Click the events tab). Tickets are free.
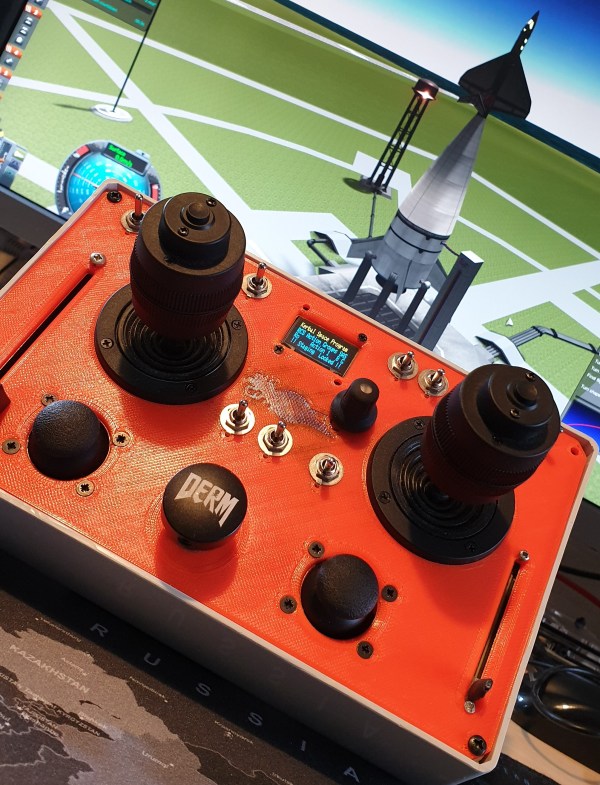
Kerbal Space Program is a brilliant game/Space Flight Simulator, it teaches the basics of rocket science, and aerodynamics, and lets you test out crazy contraptions that only exist in science fiction and never before realised concepts.
The scope for this project was to replace the typical keyboard game controls, with a far more interactive, intuitive and fun Analogue Stick control layout. I wanted to be able to assign different controls depending on whether a Rocket is being flown to orbit, a Spaceplane was lining up on final approach to a runway, or a Rover was being driven across the surface of The Mun.
The controller runs off an Arduino Mega 2560 and uses the Kerbal SimPit Mod installed in the Game Data folder of Kerbal Space Program. The ready-made Arduino library, Kerbal SimPit is available from the Arduino Library Manager, and this handles all the communication between the controller and the game.
Functions:
As well as the typical flight controls, Pitch, Yaw, and Roll, the controller also handles translation controls, i.e. movement in the X, Y and Z direction when the Reaction Control Thrusters (RCS) are enabled and Rover Wheel commands, Throttle and Steering when in Rover Mode.
To be able to control each of these parameters in unison, I used two 3 axis joysticks that would operate most of the main flight controls, and two 2 axis joysticks to cover rudders in plane mode and some of the RCS translation controls. This is way more options than is really needed, but it gives the pilot scope to adapt the controls to suit different vehicles and flying styles.
A simple slide pot enables fine control of the Main Engine Throttle, which makes precise landing burns easy and fun to pull off. No more need for parachutes, just make sure you have enough fuel to complete your suicide burn!
A large Staging button in the centre of the console takes the place of the spacebar. Press this button to go to space. Always make sure you check your staging before hitting the go button.
Once underway, its often prudent to lock the staging button until it is required again. A handy toggle switch is provided to lock the staging button, ensuring your rocket doesn’t break into different pieces at an inopportune moment.
The other switches let the pilot raise and lower the gear, apply brakes, toggle SAS (Stability) and RCS modes, or trigger any of 10 or 20 different custom actions depending on which other mods you have installed.
Of course, any Rocket is incomplete without some way of aborting the flight and saving the cosmonauts when everything is going wrong. In case of RUD, Rapid Unscheduled Disassembly, pressing and holding the Abort Switch prompts the pilot to press the stage button to engage Abort Mode.
Once Abort Mode is engaged, there is no turning back. If you have set it up your actions correctly, your crew capsule separates, the abort motors fire, and your crew is dragged, kicking and screaming away from any impending explosions, and..…are safe. You remembered to pack parachutes, right?
Operation:
On boot up, if the Arduino finds a config file saved to the CD card it applies the last saved settings, if it cannot find a file it boots with factory settings, and creates a config file to save settings into. It then runs a self-calibration to make sure all the joysticks are outputting zero.
The OLED screen displays various actions, like which SAS mode has been triggered, and the status of Brakes and the Gear. It also lets budding Astronauts change and save the different options for each of the flight modes, Rocket, Plane and Rover, run the calibration routine, and set the SD card to restore the factory config file on bootup.
Design: The front panel was designed in Fusion 360, and 3D printed to fit an off the shelf Hammond, although this version was measured slightly inaccurately and required a small amount of filing to get some parts to fit.
The wiring was planned using DIY Layout Creator, I wanted every connection on header pins, allowing easy maintenance and future expansion or improvements. All the power, GND and Signal wire to and from the front panels, including pull up and pull-down resistors would be over two daughterboards.
Organised Chaos. Imagine how it would look without planning.
Improvements:
Due to the limitations of the mod and the game functions, several of the switches for the SAS autopilot do not function as well as hoped and occasionally cause the game to crash when operated.
These controls are also assigned to the keyboard numpad, so a second controller could be used to handle these commands, as well as some other keyboard shortcuts the game relies on, like changing camera views and controlling the time warp functions. This could run on an Arduino Leonardo, which would show up as a keyboard or Joystick input to the computer.
I would really like to improve the front panel, possibly make it into a single PCB that can have the control labels silkscreened directly on. This could also save all of the offboard wiring, and a single ribbon cable used to connect the Arduino to the front panel.
For the source code for this project, see my GitHub repo @:
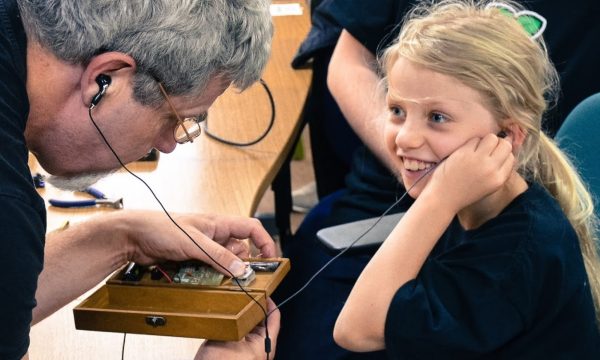
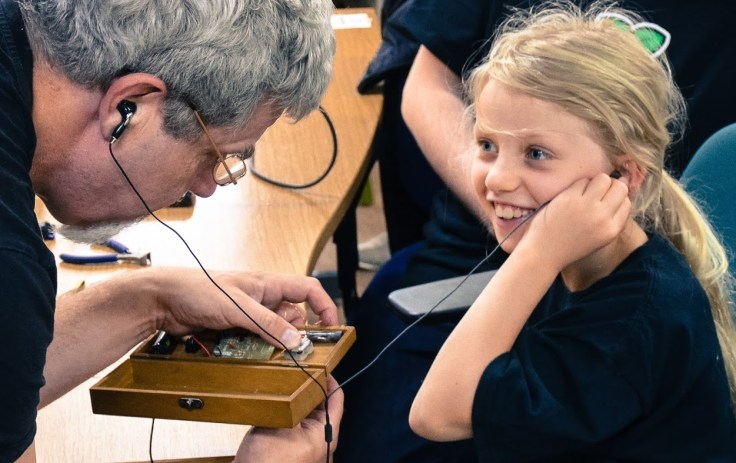
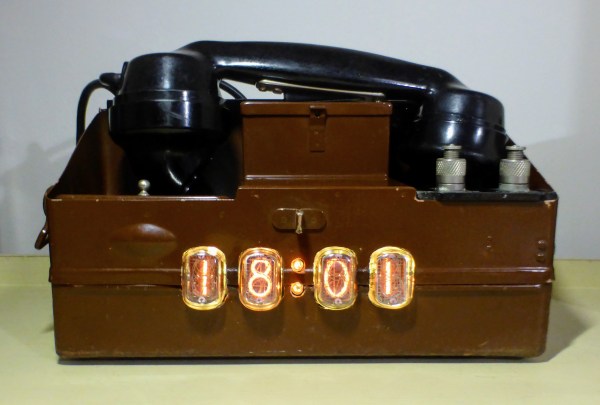
I came across an old military field phone for sale in a junk shop and loved the look of the phone,. However, I wanted the phone to be functional in an interesting way and no just something to look at.
So after speaking to Mike, he gave me the brilliant idea of having the phone speak inspirational quotes. We discussed how we could go about doing this and decided to buy and mp3 module that could be triggered via a set of buttons on the phone.
So I took the MP3 module and soldered the speaker output pads to the handset of the phone, added some buttons such as play, next track/quote, pause etc. then I took an audiobook full of quotes and converted it to MP3 format, then separated each track with Audacity to have its own file which could be stored on a micro SD card and played on the MP3 module.
Nixie Clock Upgrade
After making the quote speaking phone, I decided to take the project further by adding some front-facing nixie tubes soldered to a nixie clock circuit board purchased from eBay.
I made a template of the clock, taped it into position on the phone, then drilled and filed out the oval shapes that would fit the nixie tubes. Then I wired the MP3 module and nixie clock to one USB input at the back of the phone case so one power supply could be used for both functions.
A final check to make sure all cables and connections were well insulated and safe from touching the metal phone case and then the clock was fired up. It really does look great.
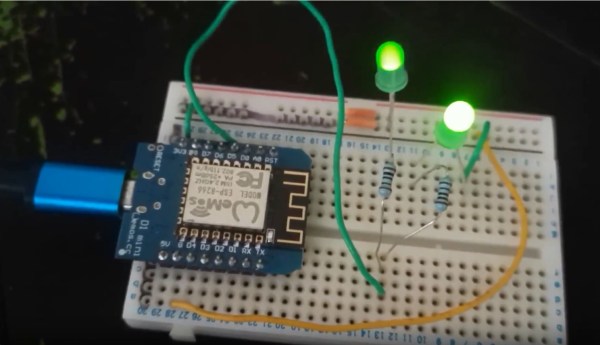
Not many people know that it is possible to control 2 LEDs individually with just a single digital output pin. See the video below for proof. These 2 LEDs are both connected to the same pin, digital pin D5 on a Wemos D1 mini.
How is this magic possible? Take a look at the circuit diagram. As you can see we have both of the LEDs connected to the same digital pin. However, one LED has its cathode (negative leg) connected to ground and the other one is connected to 5v (or 3v on a Wemos D1).
To light up LED 1, make the digital pin an output and make the pin HIGH. Electricity will flow from the digital pin to ground, lighting up LED 1. To light up LED 2, make the digital pin go LOW. Now the electricity will flow from the 5v (0r 3,3v) pin to ground via the digital pin that has been pulled low.
To turn both LEDs off, make the digital pin an INPUT, which will prevent the voltage from going anywhere and both LEDs now turn off.
So, how do you light up both LEDs? Well, it is not possible. However, you can trick your eye into seeing they are both on by turning each LED on in quick succession very very fast.
Take a look at the entire code below and you will see how to turn both LEDs on at the same time in the do…while loop.
unsigned long counter;

void setup() {
    pinMode(D5, OUTPUT);
}

void loop() {
    // Turn LED A on B off
    pinMode(D5, OUTPUT);
    digitalWrite(D5, HIGH);
    delay(1000);

    // Turn LED B on A off
    digitalWrite(D5, LOW);
    delay(1000);

    // Turn LED A and B on (very fast)
    counter = millis();
    do
    {

        digitalWrite(D5, HIGH);
        digitalWrite(D5, LOW);
    } while ((millis() - counter) < 1000);

    // Turn LED A and B off
    pinMode(D5, INPUT);
    delay(1000);
}
The only disadvantage to this is when both LEDs are apparently on they re slightly dimmer then when on individually. However, for the sake of saving 50% of he number of pins this is a small trade-off.
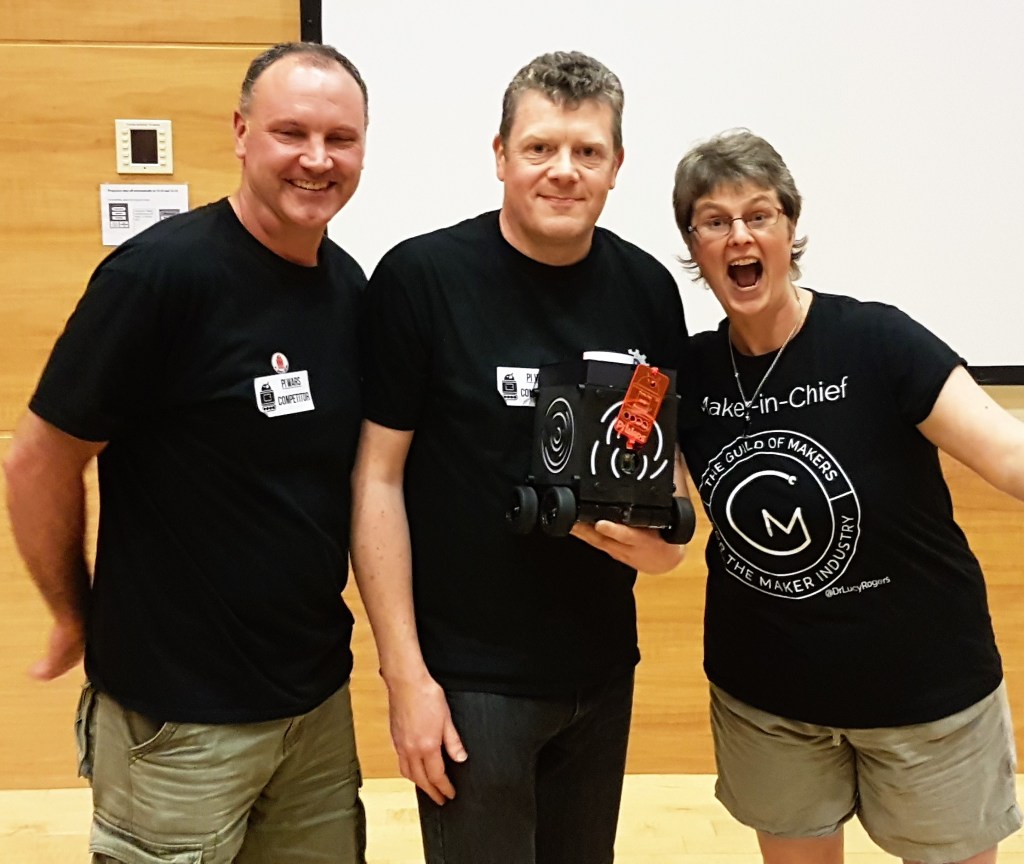
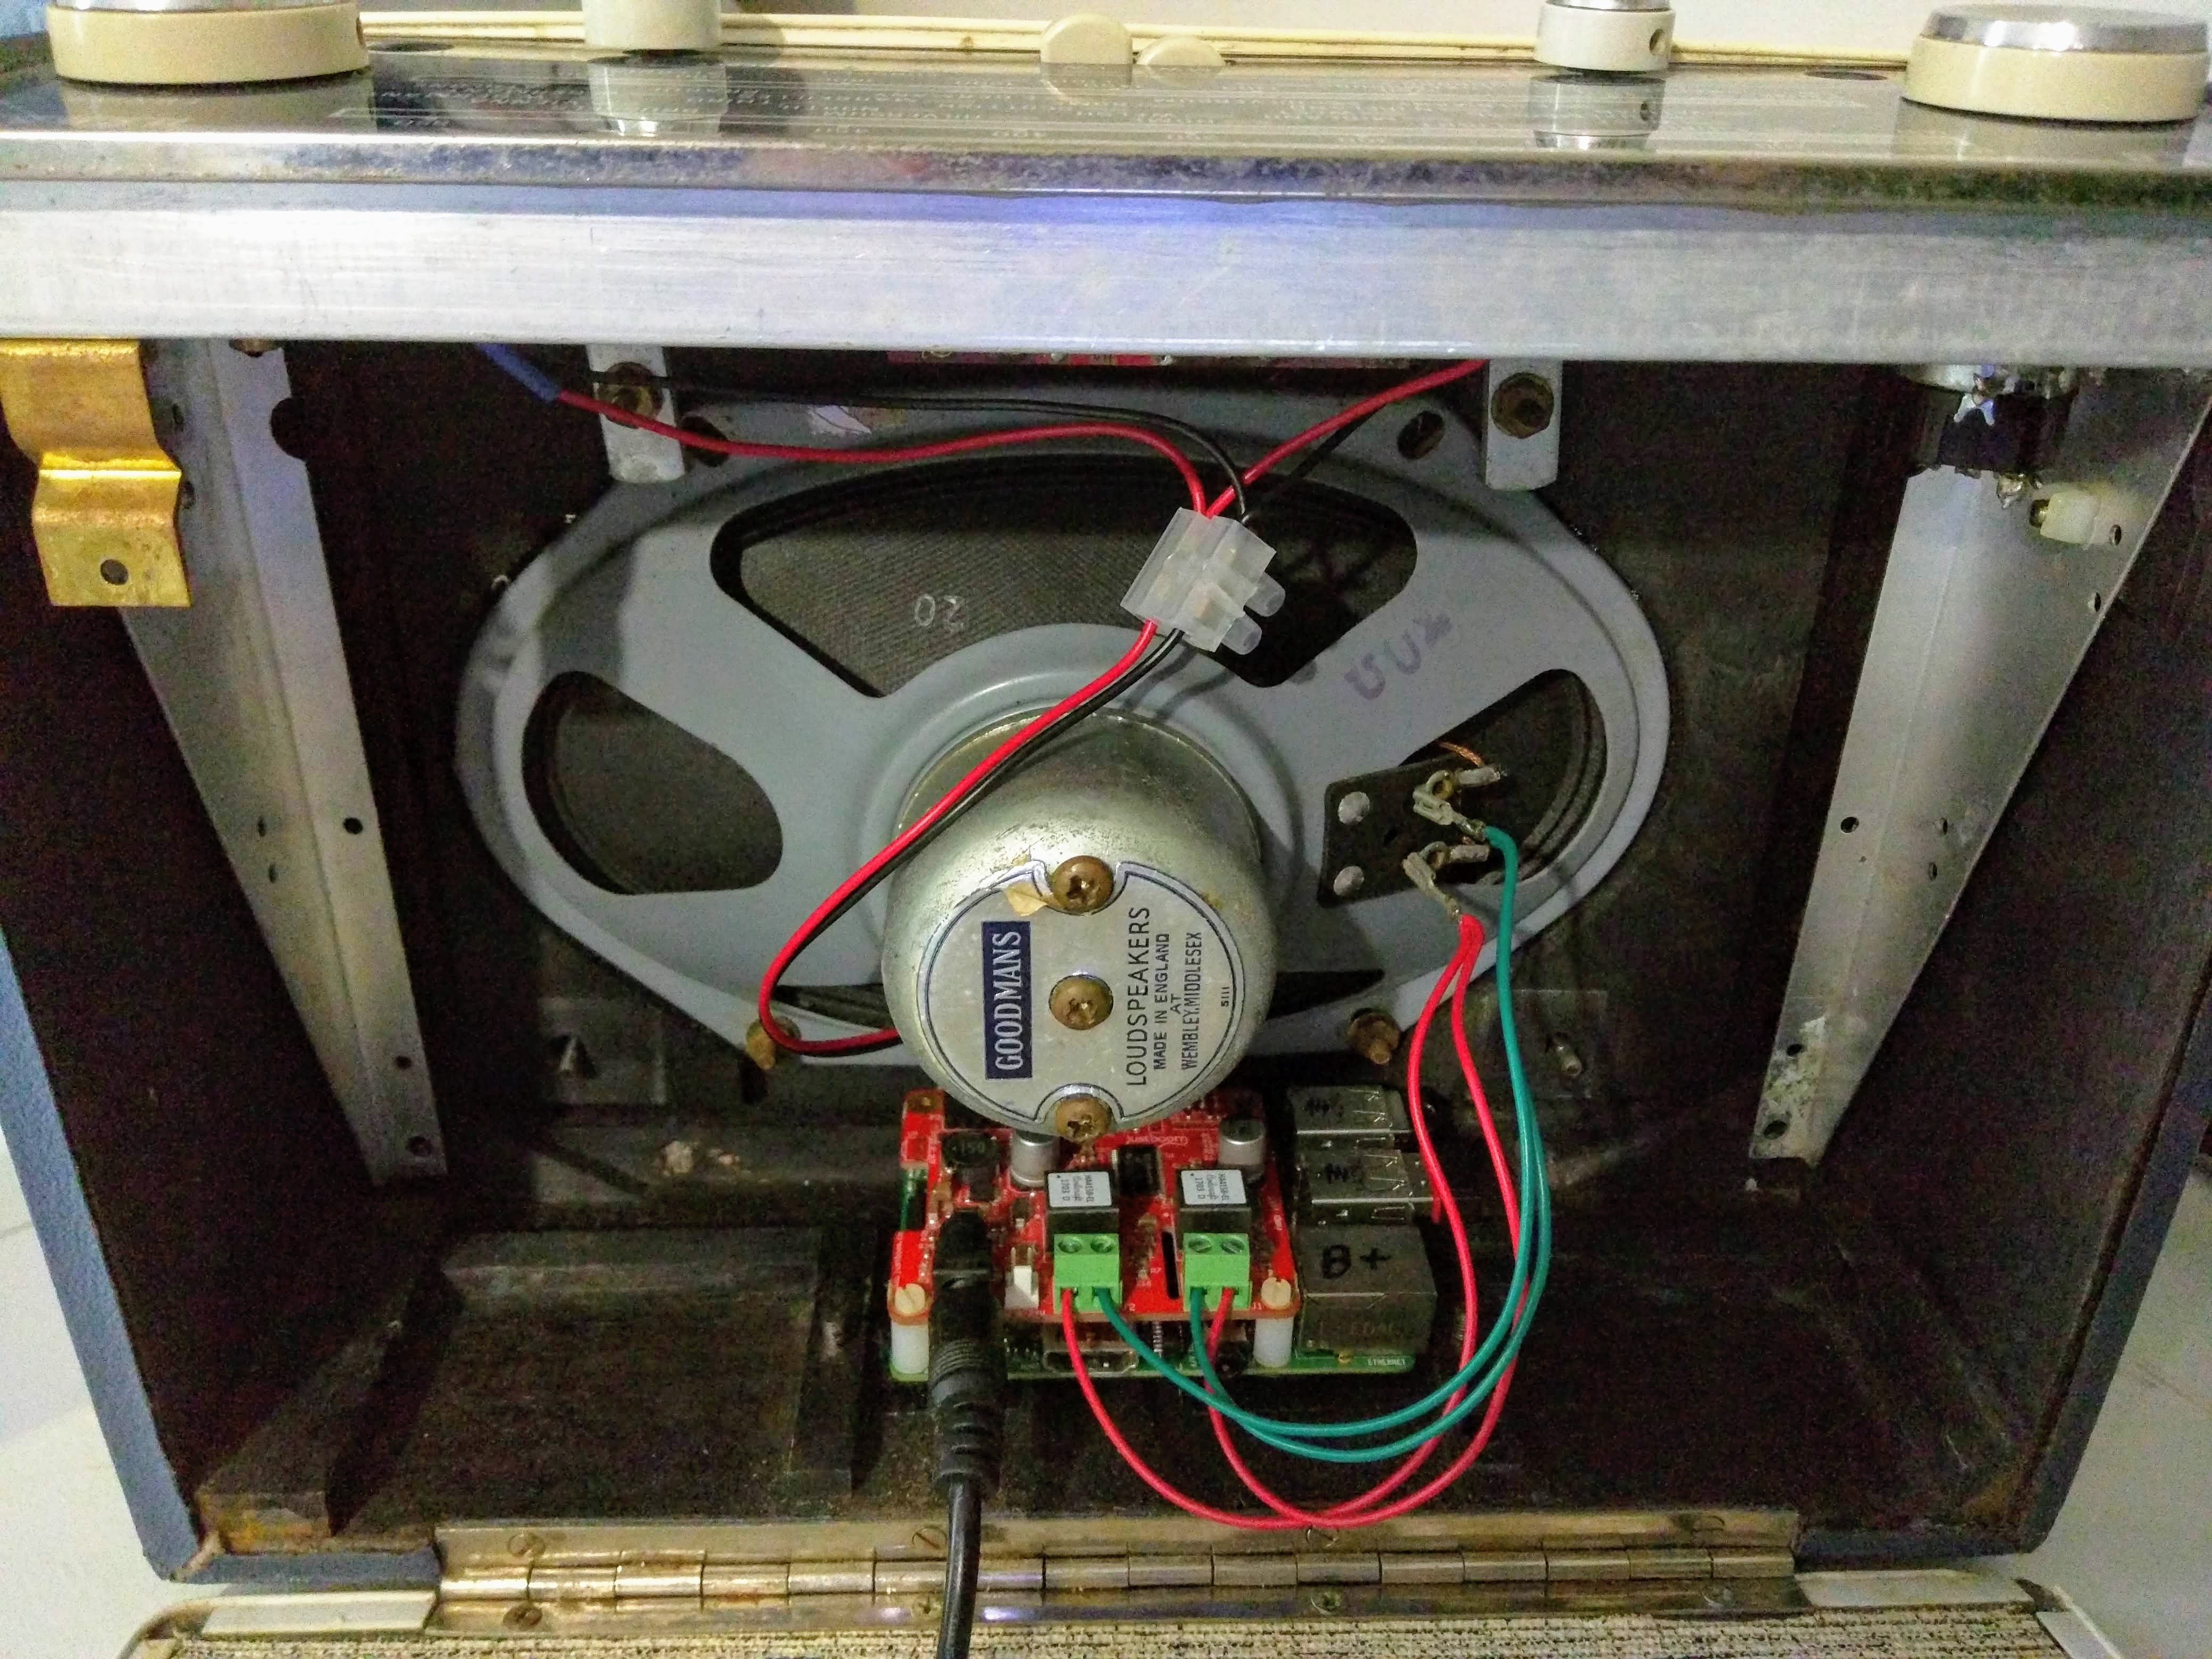
Back in 2016 Medway Makers were the first place winners in our class at the Pi Wars robotic competition at Cambridge University. Part of Medway Makers prizes for winning at PiWars was a Raspberry Pi audio amplifier hat and this device was the perfect opportunity to bring an old retro ‘Hacker’ (Yes, it really is called that) radio up to date and into the 21st century.
The radio was taken apart and I everything inside the radio that was no longer going to be used was discarded. Then, a Raspberry Pi with the amplifier hat was added inside and I soldered the output to the original radio’s speaker.
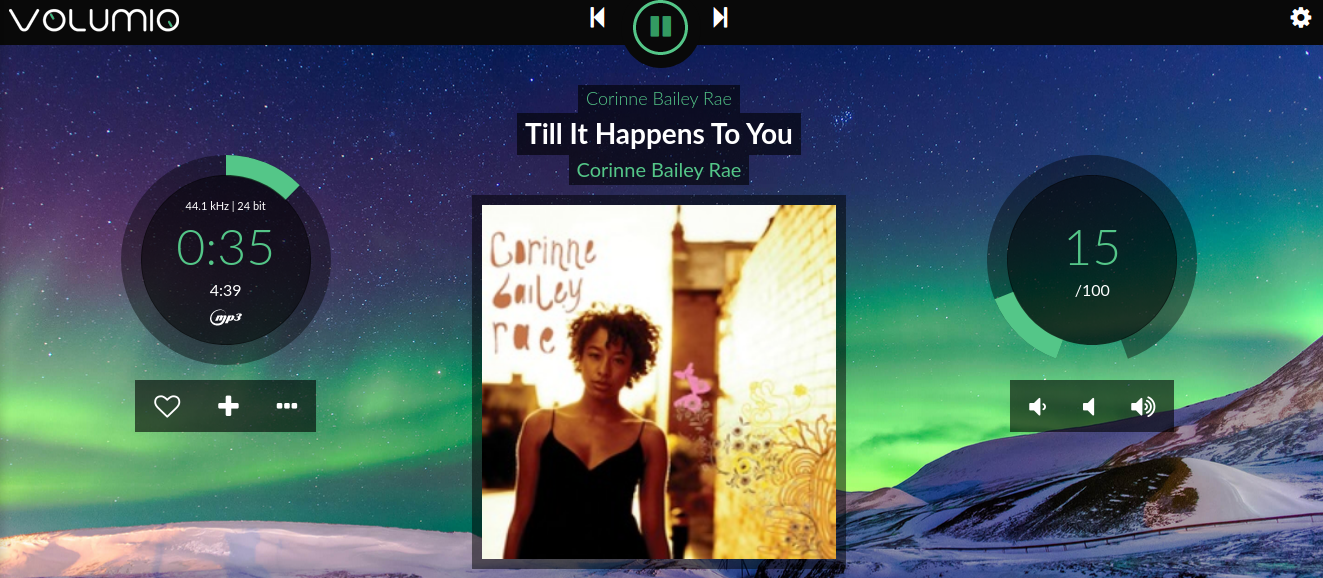
There are several software choices to use for your internet radio, and I decided to use Volume IO. This was flashed to the micro SD card of the Raspberry pi. Volume IO has a nice, easy to use web interface, the official app works well, and it’s easy to add your own music collection via a USB stick.
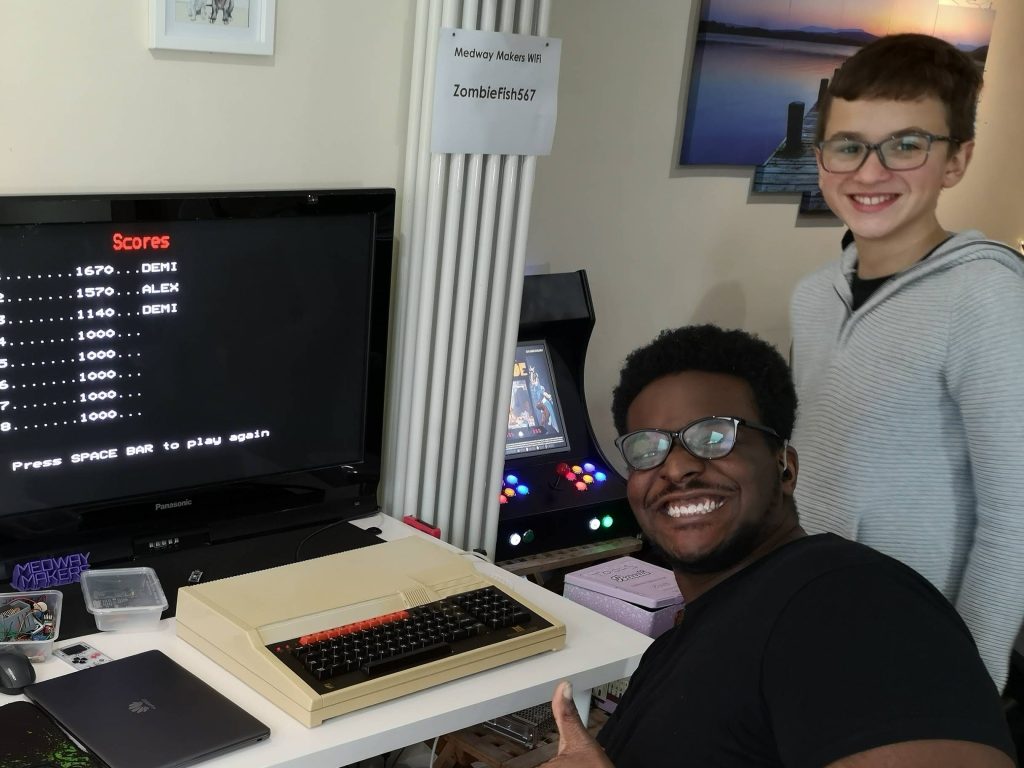
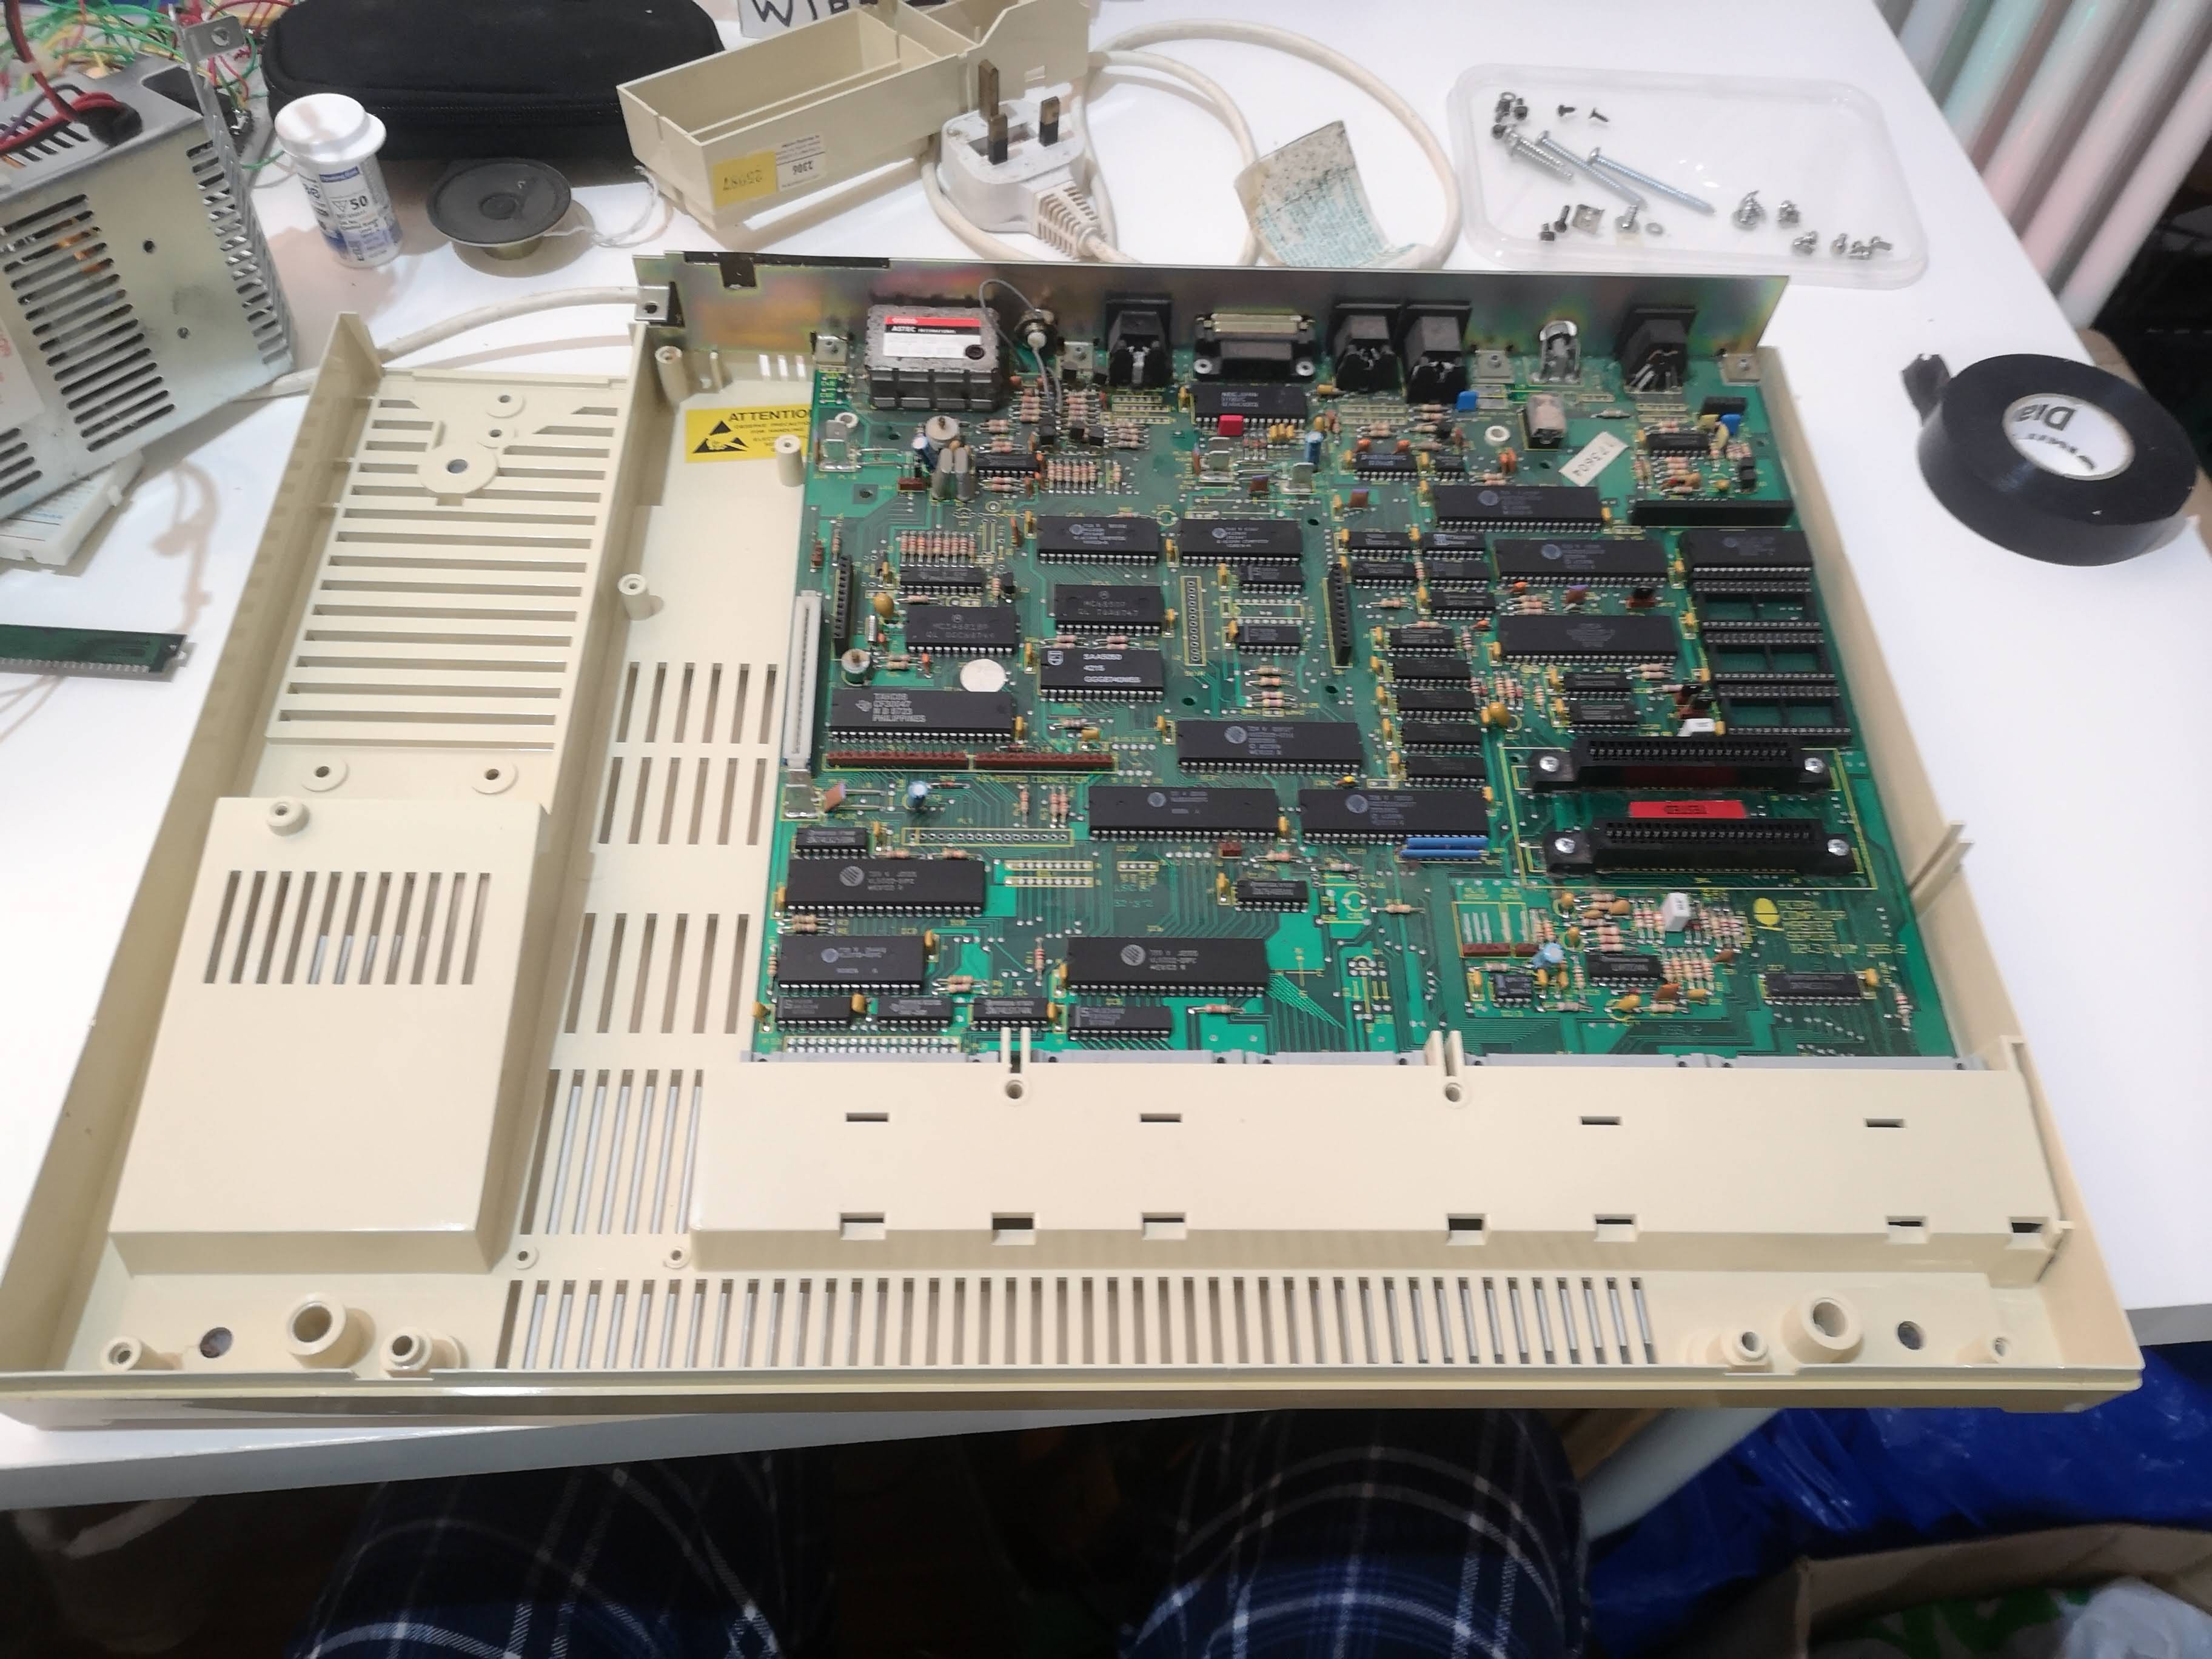
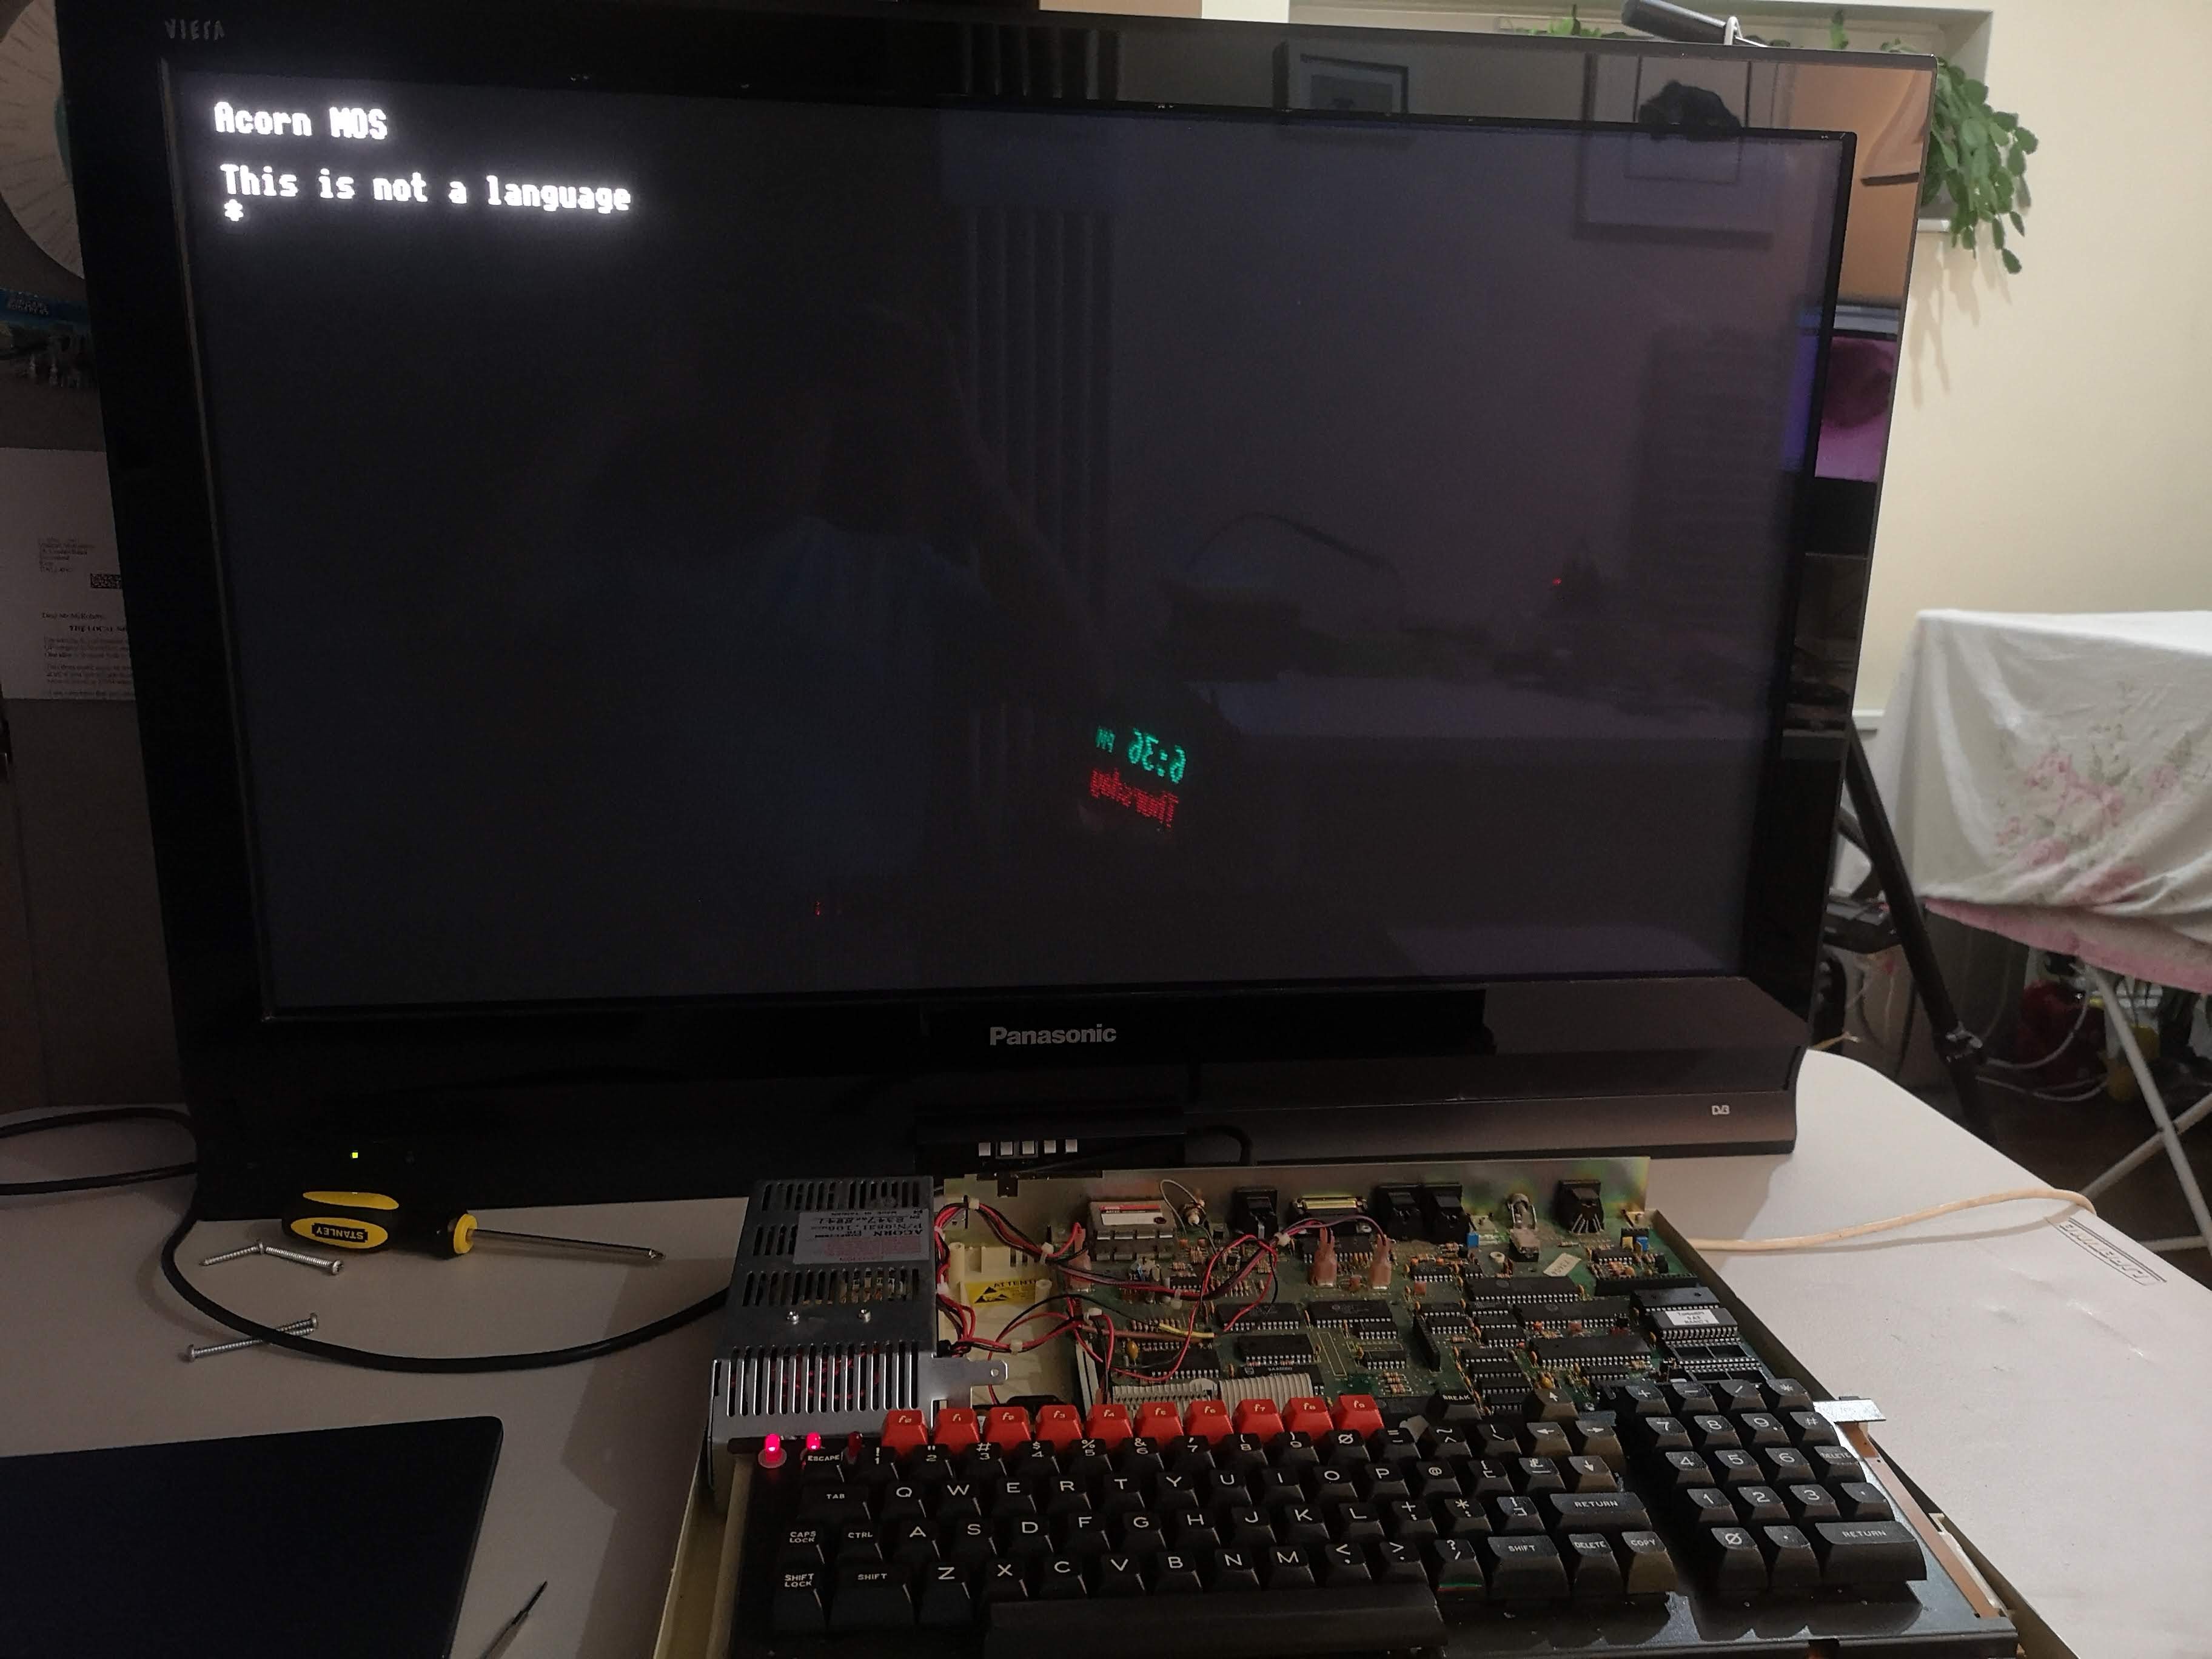
Over the Christmas period, Mike was lucky enough to be gifted a BBC Master 128 along with a 5.25″ disc drive, a load of cables and a few games on tape. The poor BBC Master had been sat in a garage for approximately 10 years with a load of wood on top of it, gathering dust and becoming a home for spiders and beetles. Obviously, the computer was in need of some essential TLC before it could be put into use.
First, the BBC Master needed a good strip down and a clean. The PSU, motherboard and keyboard were all removed from the case. The case was full of dust, dead spiders and beetles and was very dirty. The keyboard was absolutely filthy and was first to be stripped down and cleaned. All of the keys were taken off and given a good wash in soapy water, the chassis was cleaned up as best as possible with some brushes and cotton buds and then the whole thing reassembled. The final result was a massive improvement.
Next, the two sides of the clamshell case were washed in the shower with hot soapy water to remove all of the dirt. The case is very heavily yellowed with age and a future project for the summer is to carry out the retrobright process on the case to bring it back to white again. Next, the motherboard was given a vacuum and the board a brush and wipe down.
Next, the PSU needed some work. There are three capacitors in the BBC Power Supplies that are notorious for drying out over the 30+ years it has been since they were manufactured and when they get hot they emit smoke and die. Mike purchased a capacitor replacement kit from eBay and the three offending items were replaced. The existing capacitors did look like they were in good shape, but it was better to be safe than sorry.
Finally, the battery pack needed replacing. The pack had the original Duracell batteries from the 1980’s and they had leaked all over the place. The pack was thrown away and replaced with a newly made pack using a 3 AA battery holder, diode and resistor.
Next, it was time to install the TurboSPI ROM chip and the SD Card adapter that was purchased at the same time as the capacitor kit. This would allow instant loading of games and other programs from the SD card and allows up to 512 disc images to be loaded onto the card. This was a simple case of pushing the ROM into an empty slot and pushing the SD card PCB into the user port on the underside of the computer.
Now everything was setup and ready to go, it was time to turn the computer on and hope it all worked. Voila! Everything worked fine.
After a few configuration commands were typed in to reset the configuration after it being turned off for so long and the battery pack no longer providing backup power, the Turbo MMC system was available and the contents of the SD Card could be accessed.
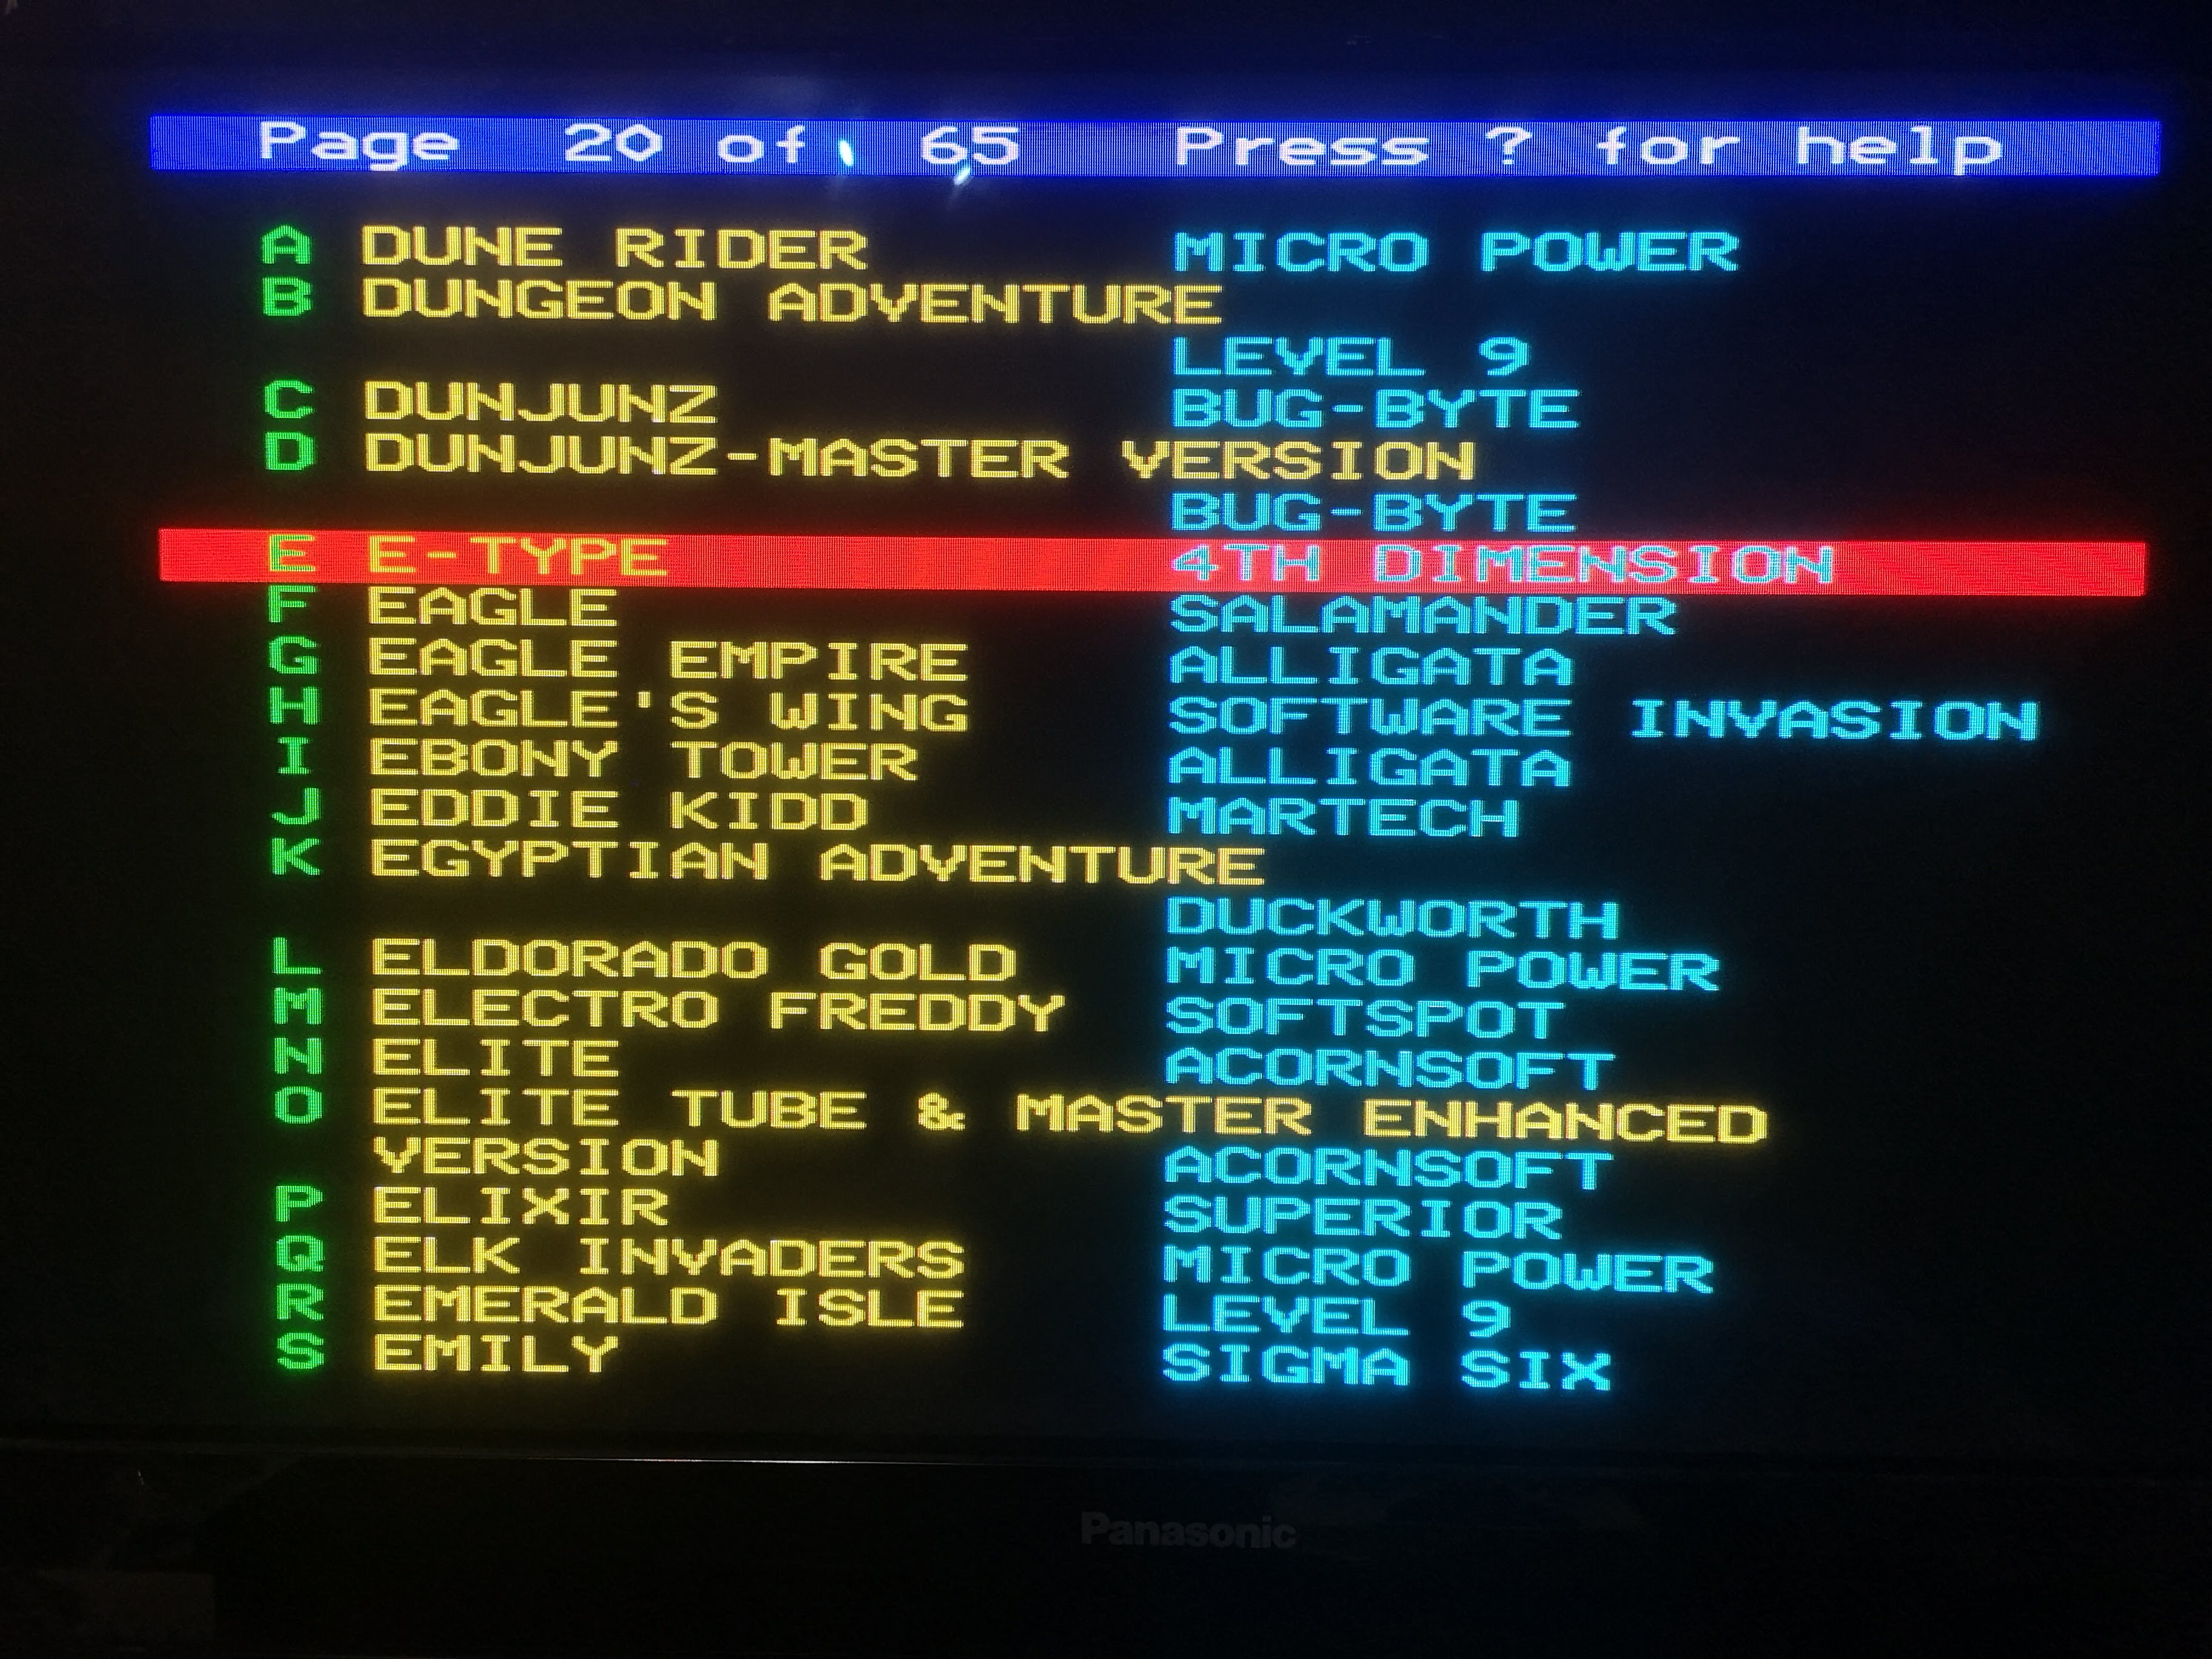
On the SD Card that came with the system are well over 1000 games that can be accessed from a menu system on Disc 0. These only take up around 50% of the available 512 disc slots leaving plenty empty to load your own games or to save your own programs to. All of the classics were present.
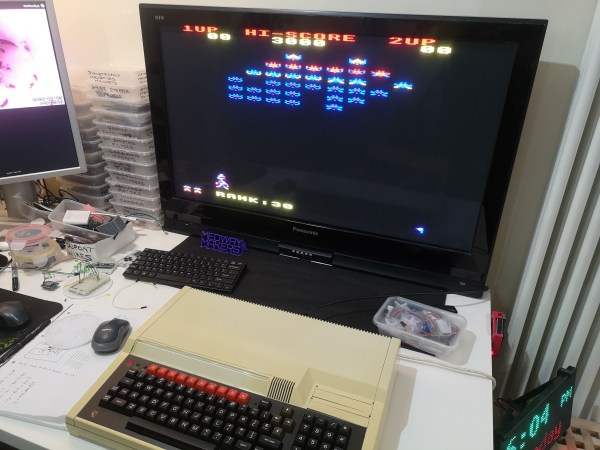
The BBC Master 128 proved to be a big hit at the next Medway Maker social meetup on Sunday 5th January with several members getting very competitive at Pacmanand a few other games.
There are a few more upgrades on the horizon with a Raspberry Pi co-processor on its way and a ROM for a BBC Master 128 specific MAMMFS file system so that Elite can be played properly.
You can see the BBC Master in use in this timelapse movie below of the last Medway Makers session on Sunday 5th January 2020.